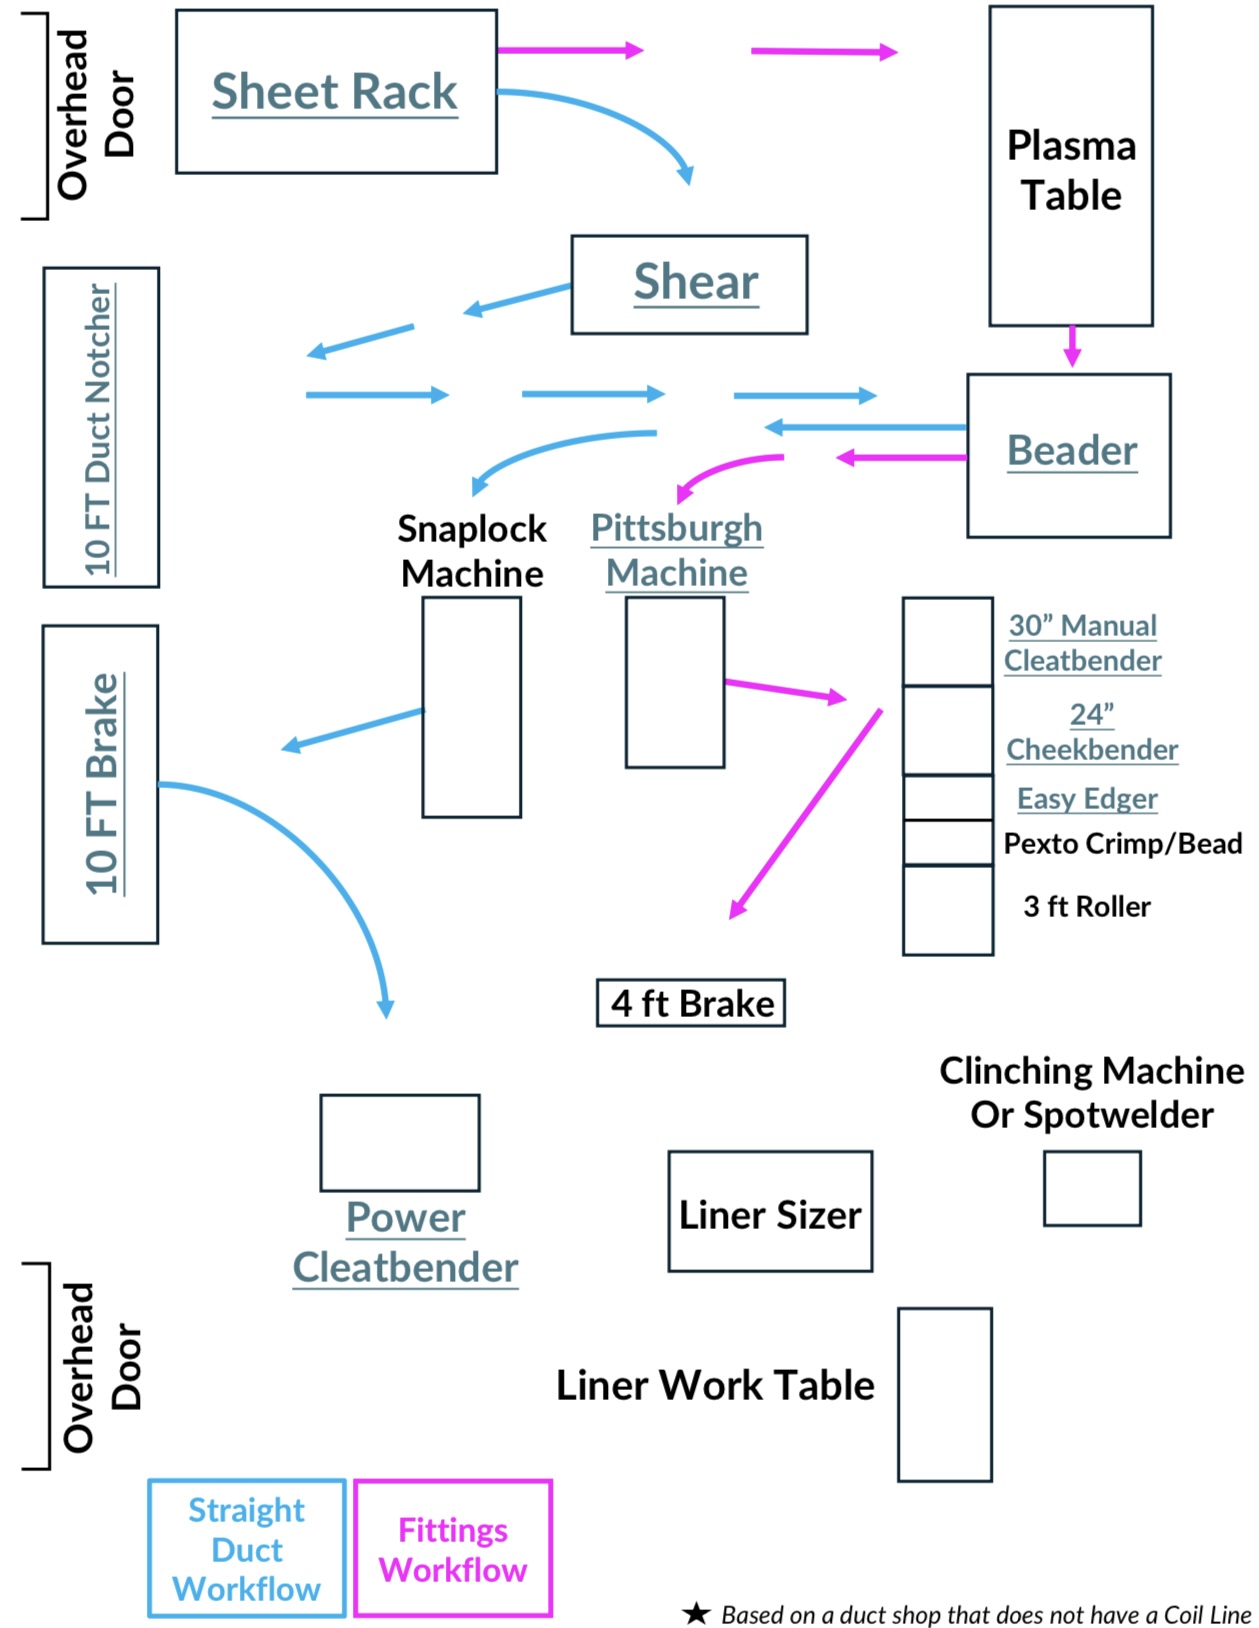
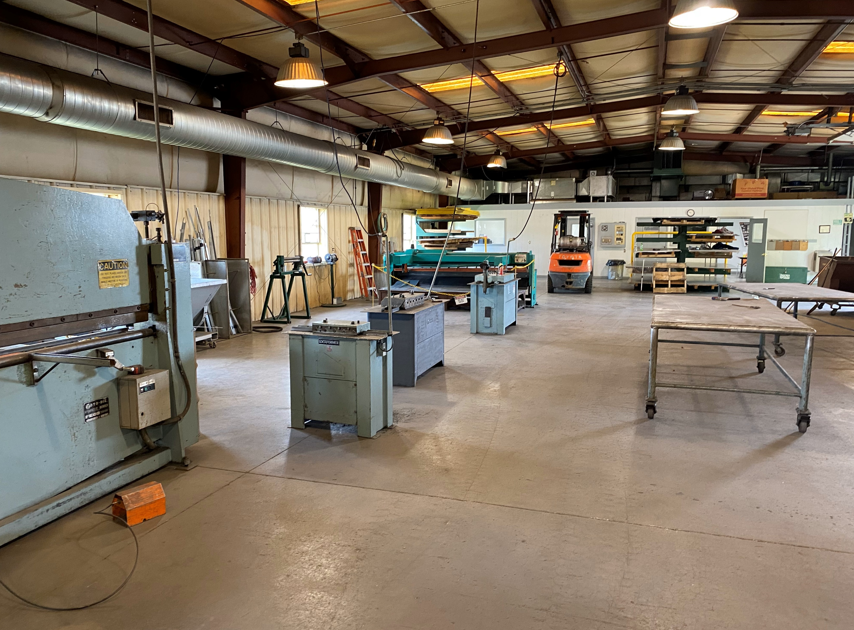
An HVAC Duct Fabrication Shop makes Rectangular Duct and Fittings that serve as the trunk line on commercial jobs. Each job is unique and requires ductwork that’s custom made to accommodate the engineer’s design and the General Contractor’s completion requirements. The goal of a shop foreman is to have fabrication machines based upon his shop’s processes and then to position those machines in such a way that the workpiece follows a clear path from start to finish, utilizing rolling tables to create a work flow that reduces the workers’ footsteps and handling of the material and avoids any backtracking of the workpiece.
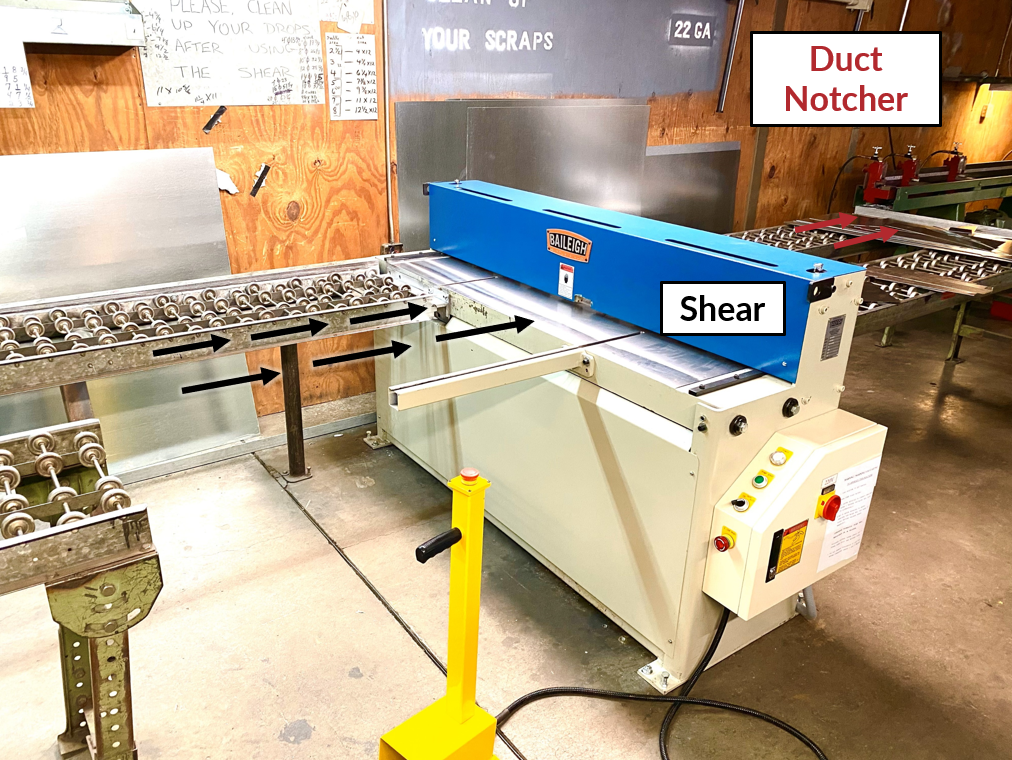
For a shop without a Coil Line, the starting point for Rectangular Straight Duct is often a Shear that’s a minimum of 4 ft wide.
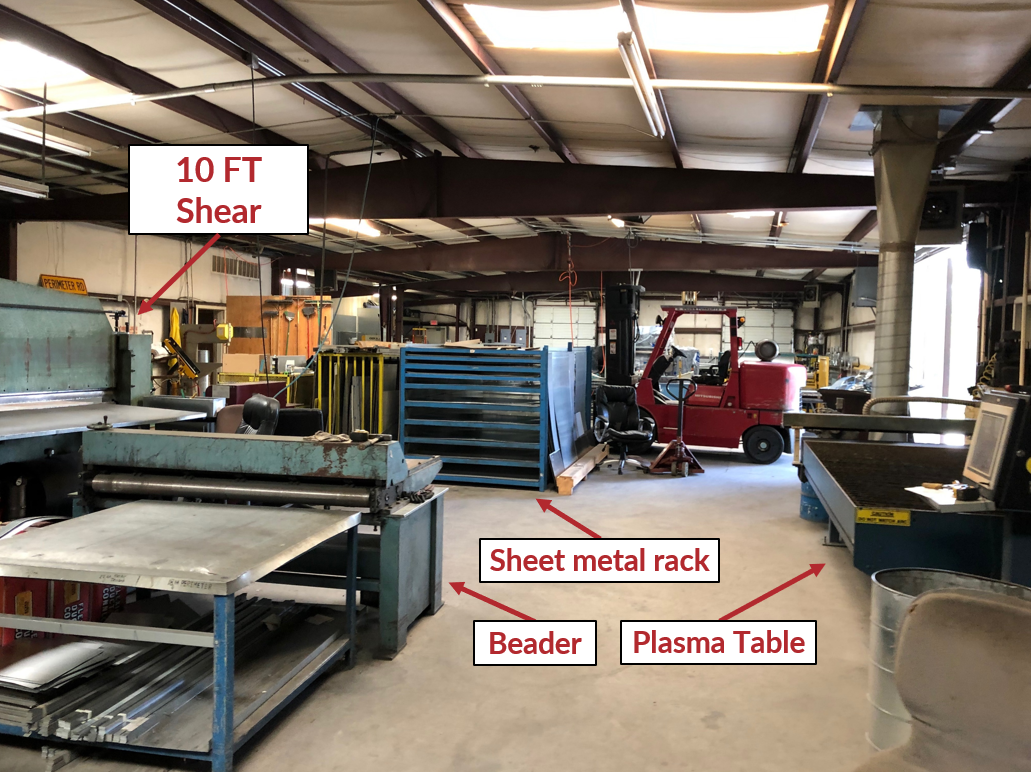
The starting point for the Rectangular Duct Fittings is always the Plasma Table.
Though shops with Coil Lines use 60″ wide metal, a shop without a Coil Line often opts for a Sheet size of 48″x120″. The reason for this is ease of handling on Straight Duct sections. The width of the sheet becomes length of a Straight Duct section. This means that 4 ft wide sheets become 4 ft long sections of Straight Duct. 5 Ft wide sheets, which translate to 5 ft sections of Straight Duct can mean extra effort in handling.
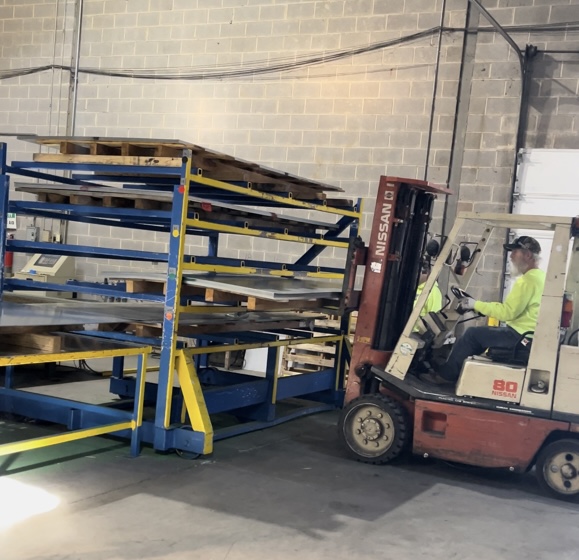
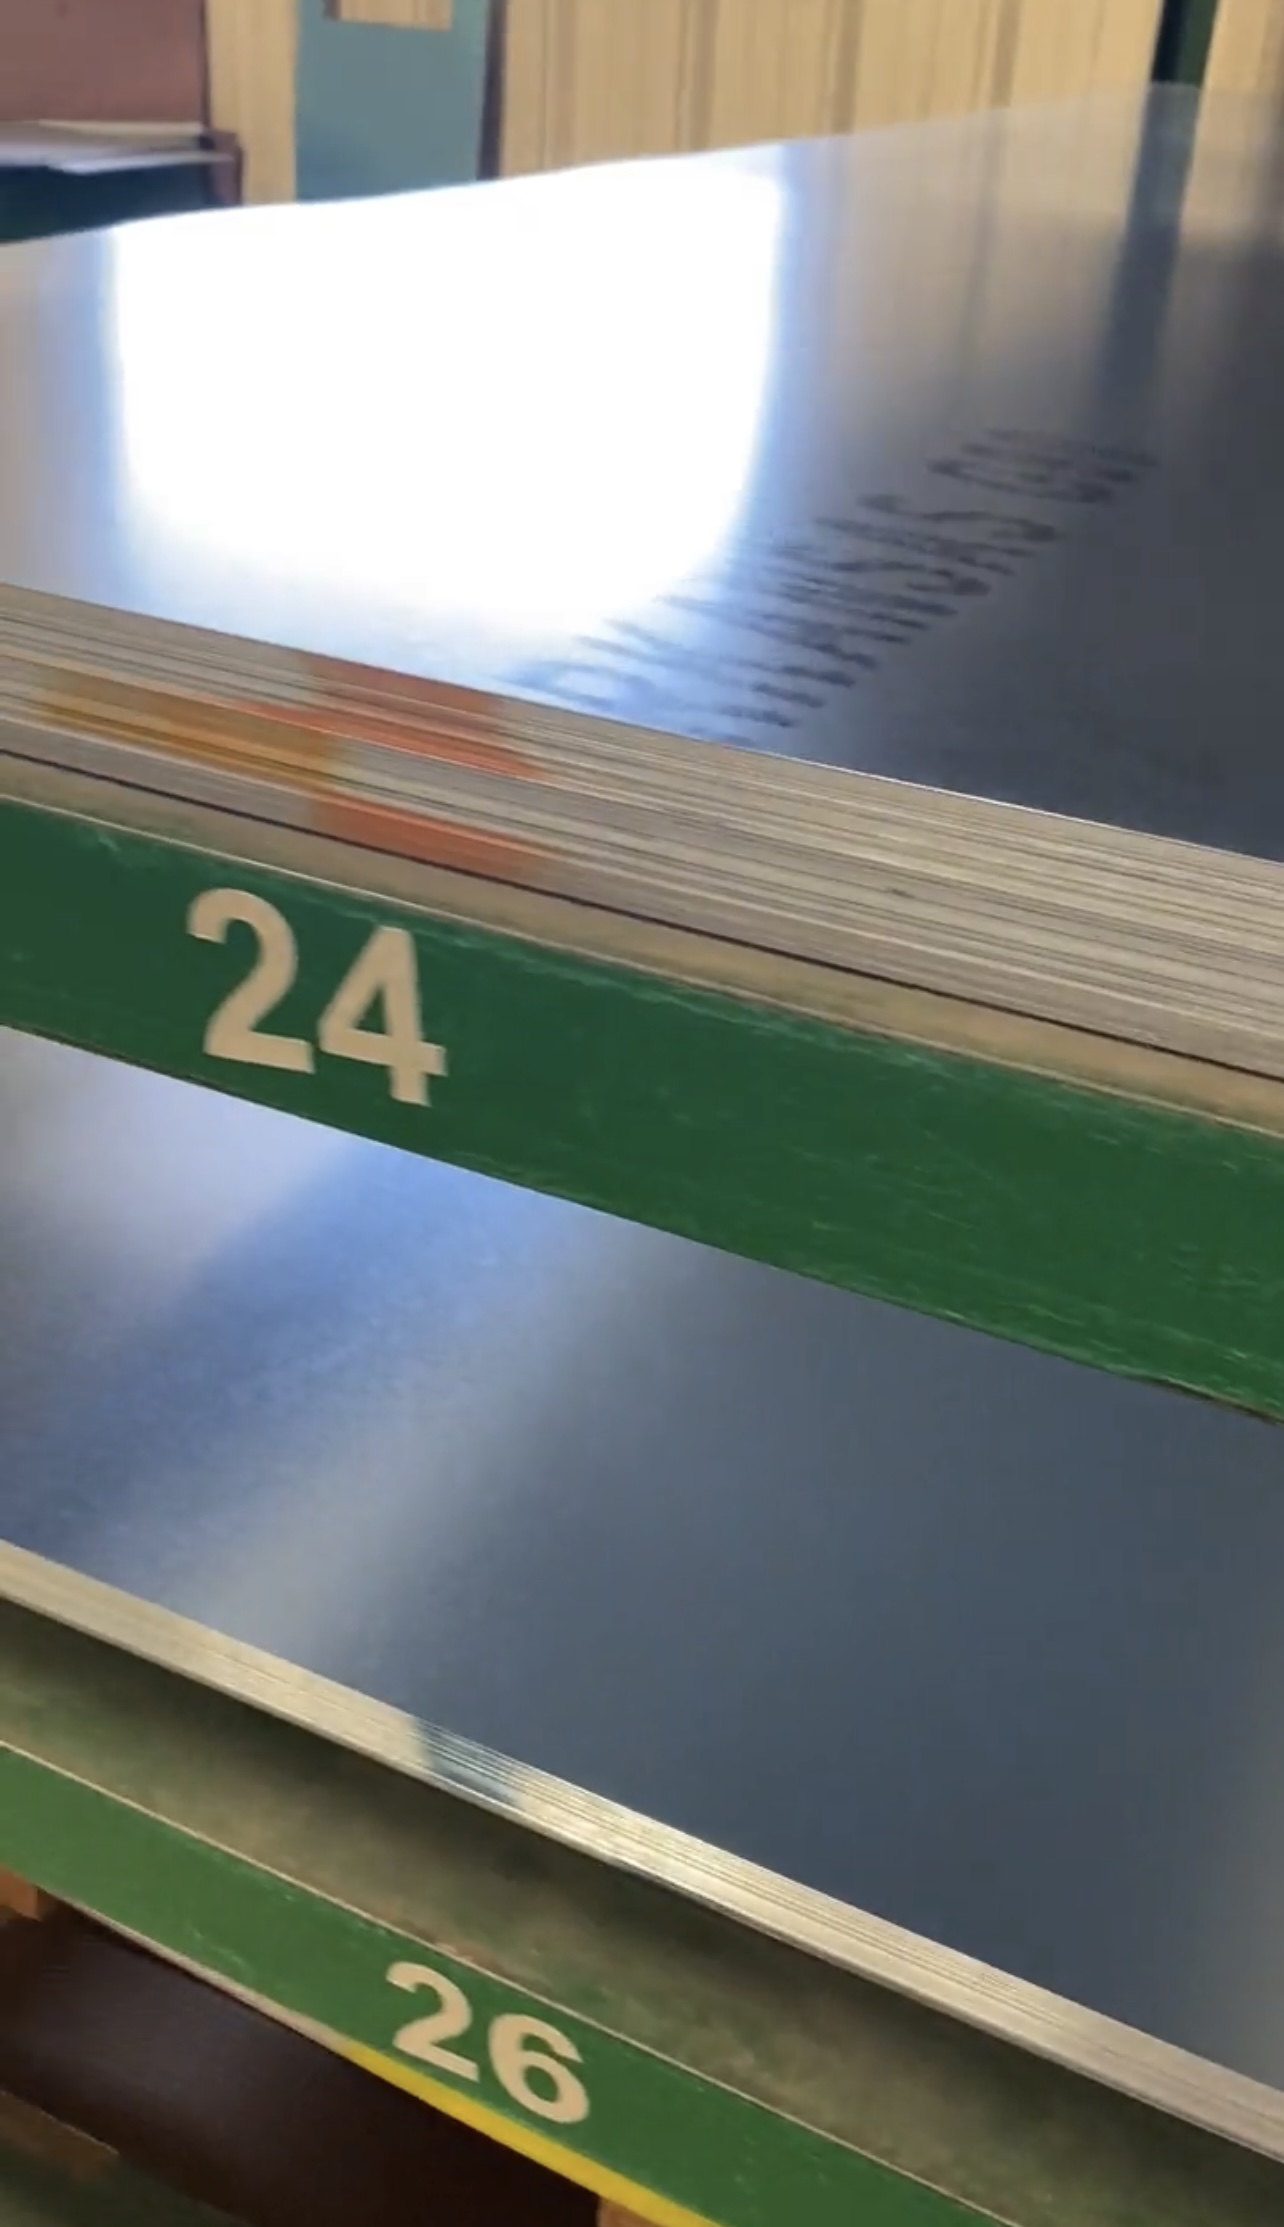
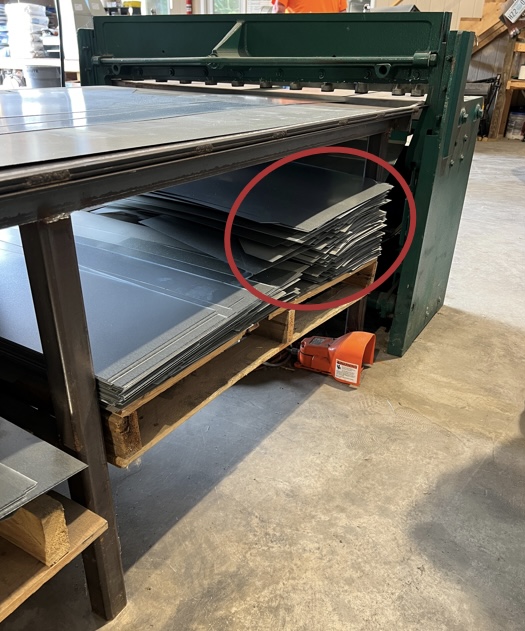
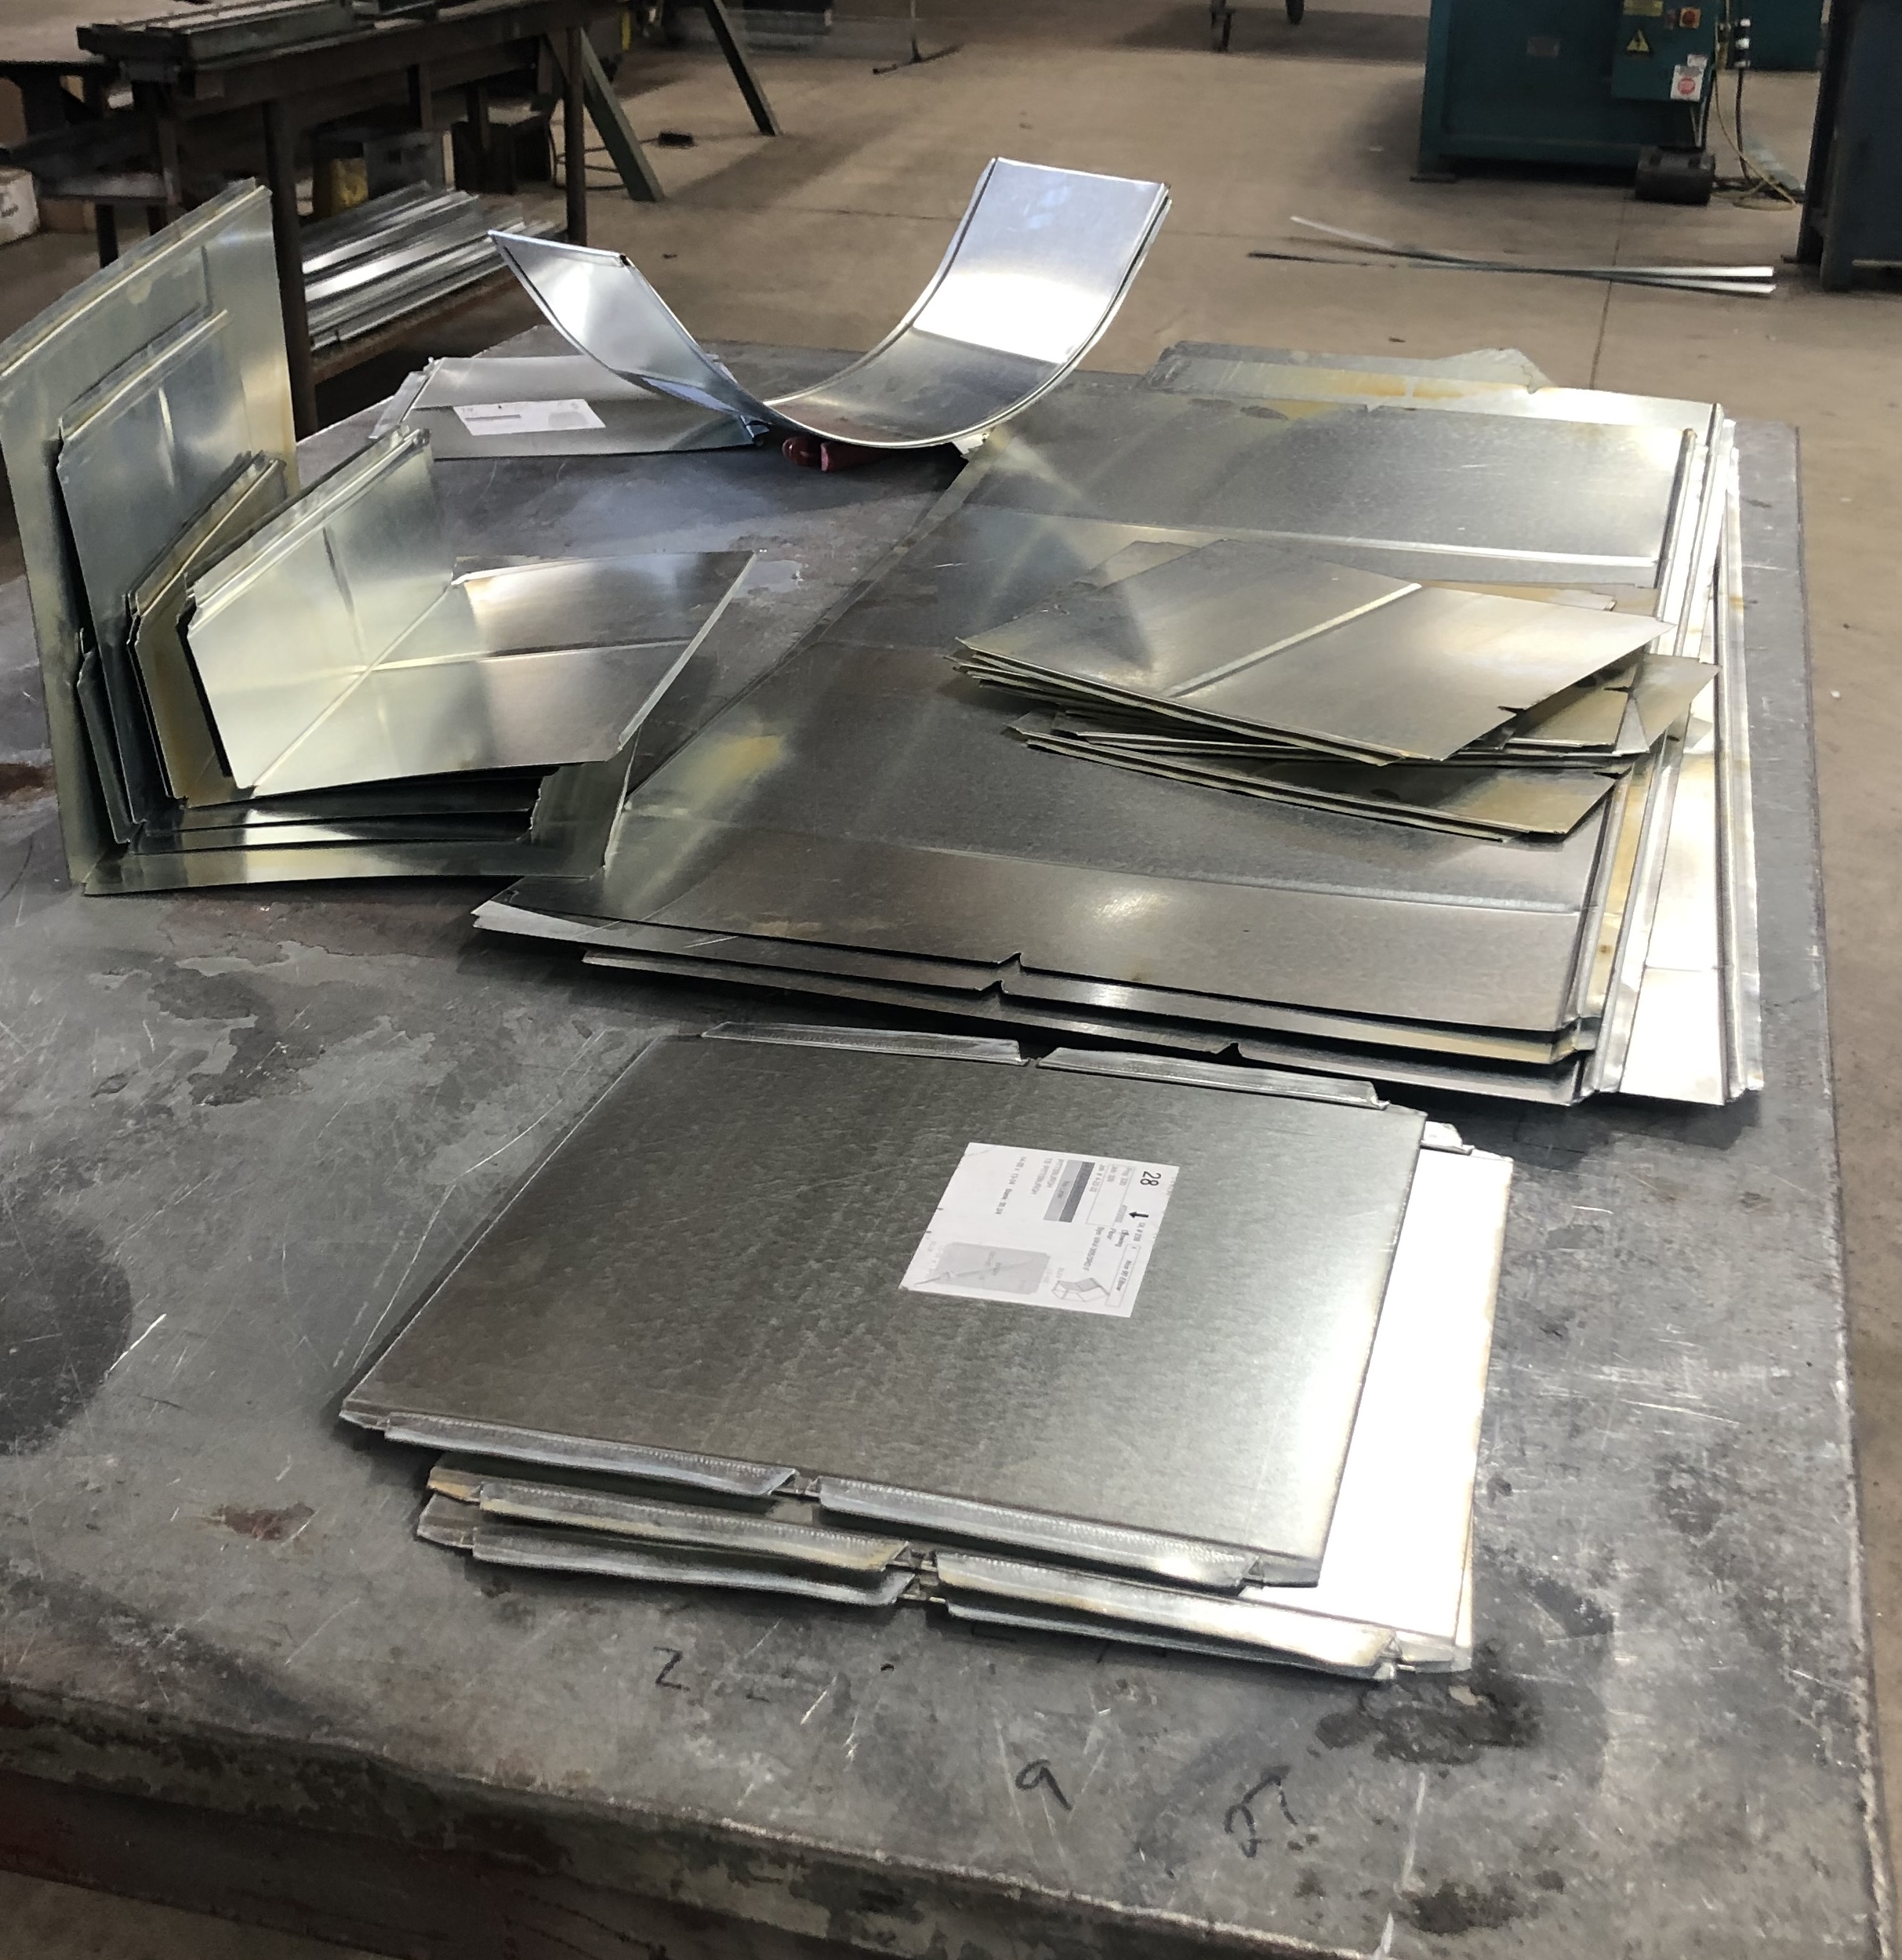
Usually a shop will use the same size sheet on their Fittings as they do on Straight Duct so as to limit the amount of effort involved with keeping track of stock levels on additional SKU’s. These sheets, a high percentage of which are 26 gauge and 24 gauge Galvanized, are purchased from a sheet metal distributor and offloaded at the shop’s overhead door, then loaded into a thick steel welded rack, usually custom made by a local steel fabricator.
While the layout of the machines will vary from shop to shop depending on floor space, it’s typical to position a shop’s sheet metal rack close to the overhead door where the sheet metal is being delivered when received from the supplier. The best sheet metal racks will allow for a 5,000 lb skid of sheets to be loaded into horizontal racking marked with the gauge it holds. In a Duct Shop, 26 and 24 gauge will have prime spots with 22, 20, 18 and 16 ga filling out the rest of the slots.
Straight Duct:
For a shop without a Coil Line, the starting point for Rectangular Straight Duct is often a Shear. The 4×10 sheet metal is pulled from the rack, taken to a 52″ wide Shear and cut to whatever long way dimension equals the stretch out of the duct’s four sides plus the allowance for the male and female longitudinal lock seams.
From the shear, the blanks are taken to the Notcher to cut out the V notches (for bending) and the Corner notches (that allow for the Pittsburgh or Snaplock profiles to be run on the two edges).
From the Notcher the blank goes to the Beader to add stiffening beads facing down on the bottom of the sheet of metal.
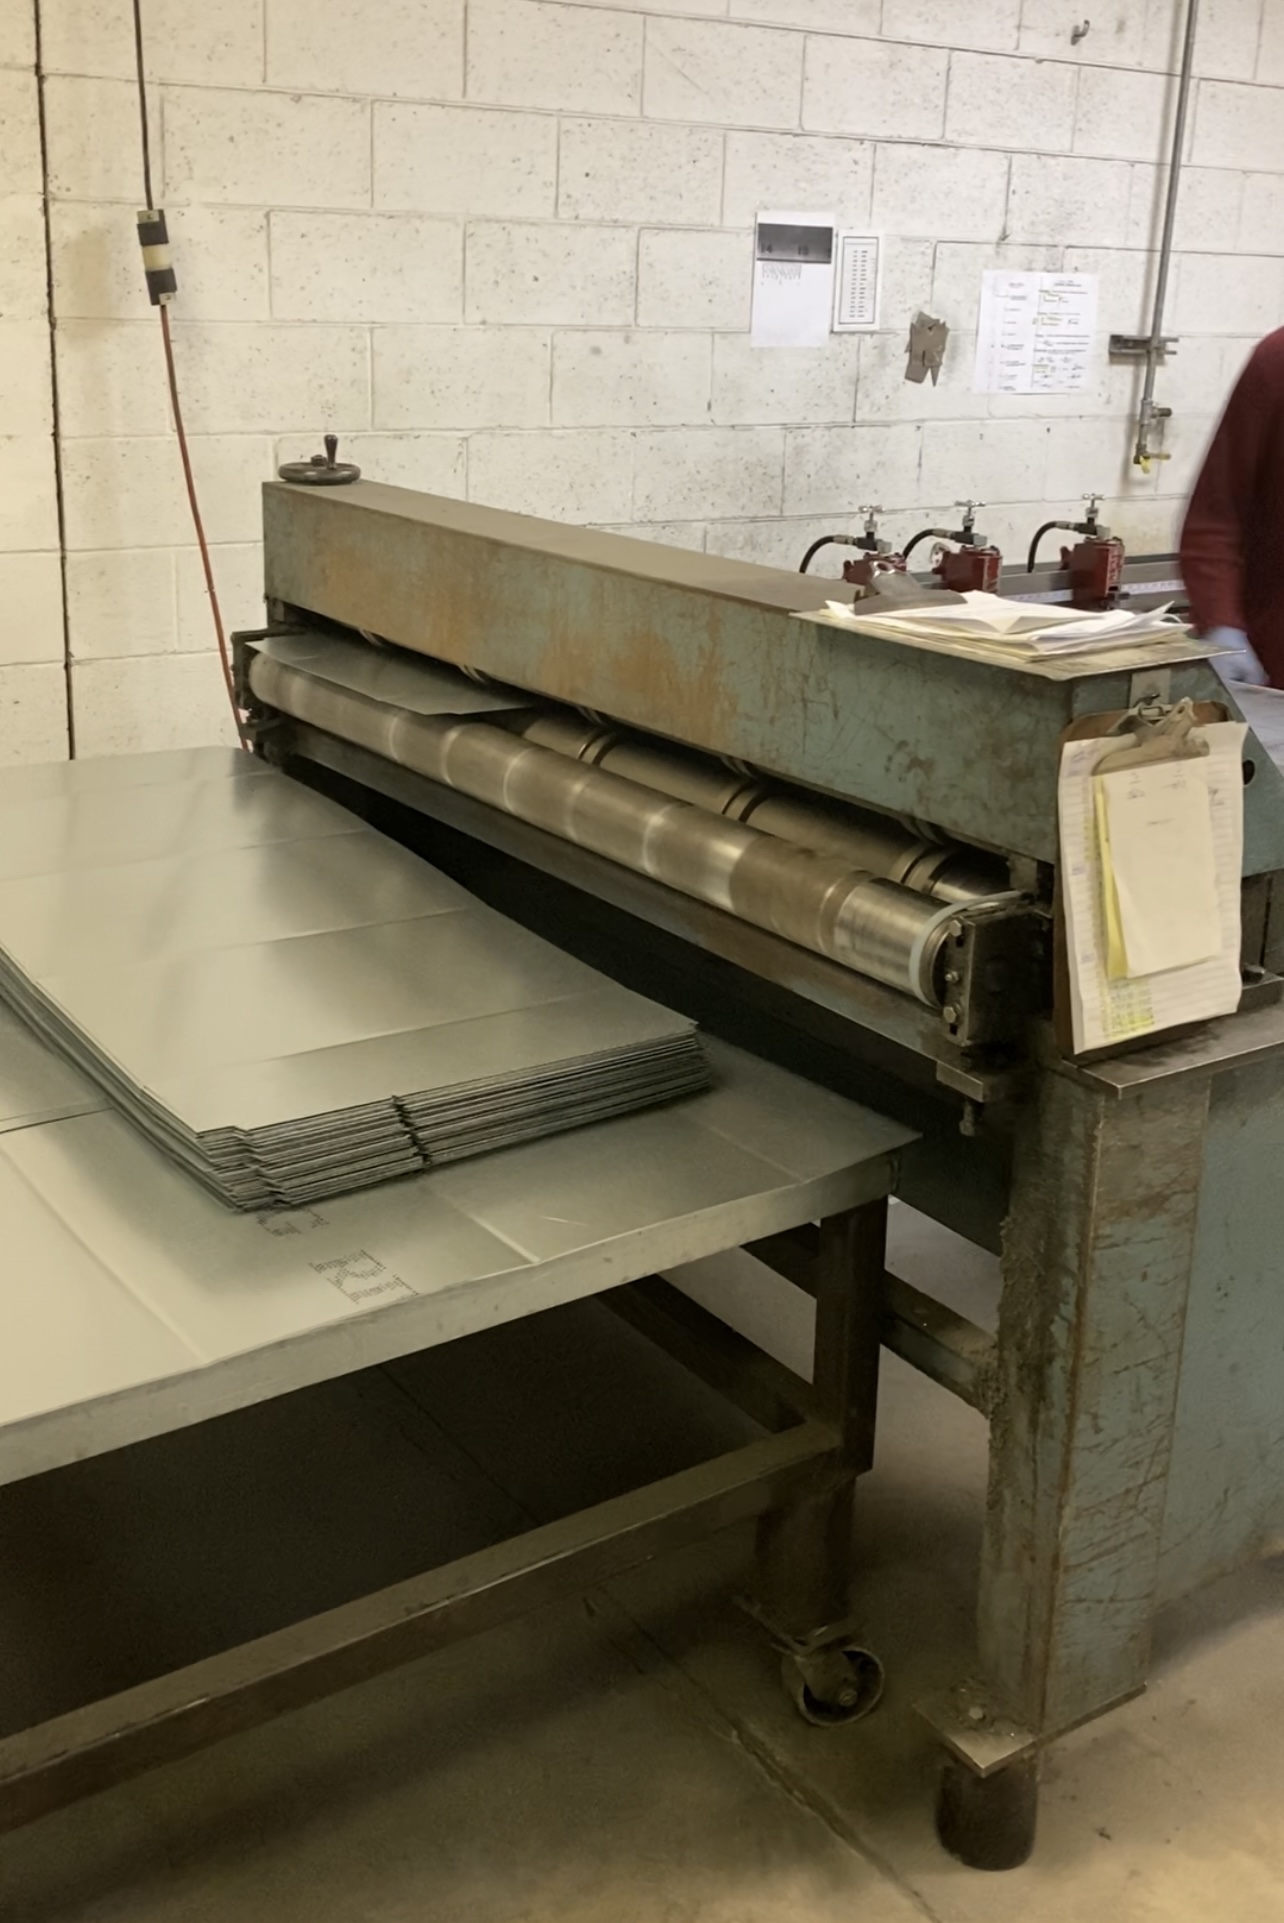
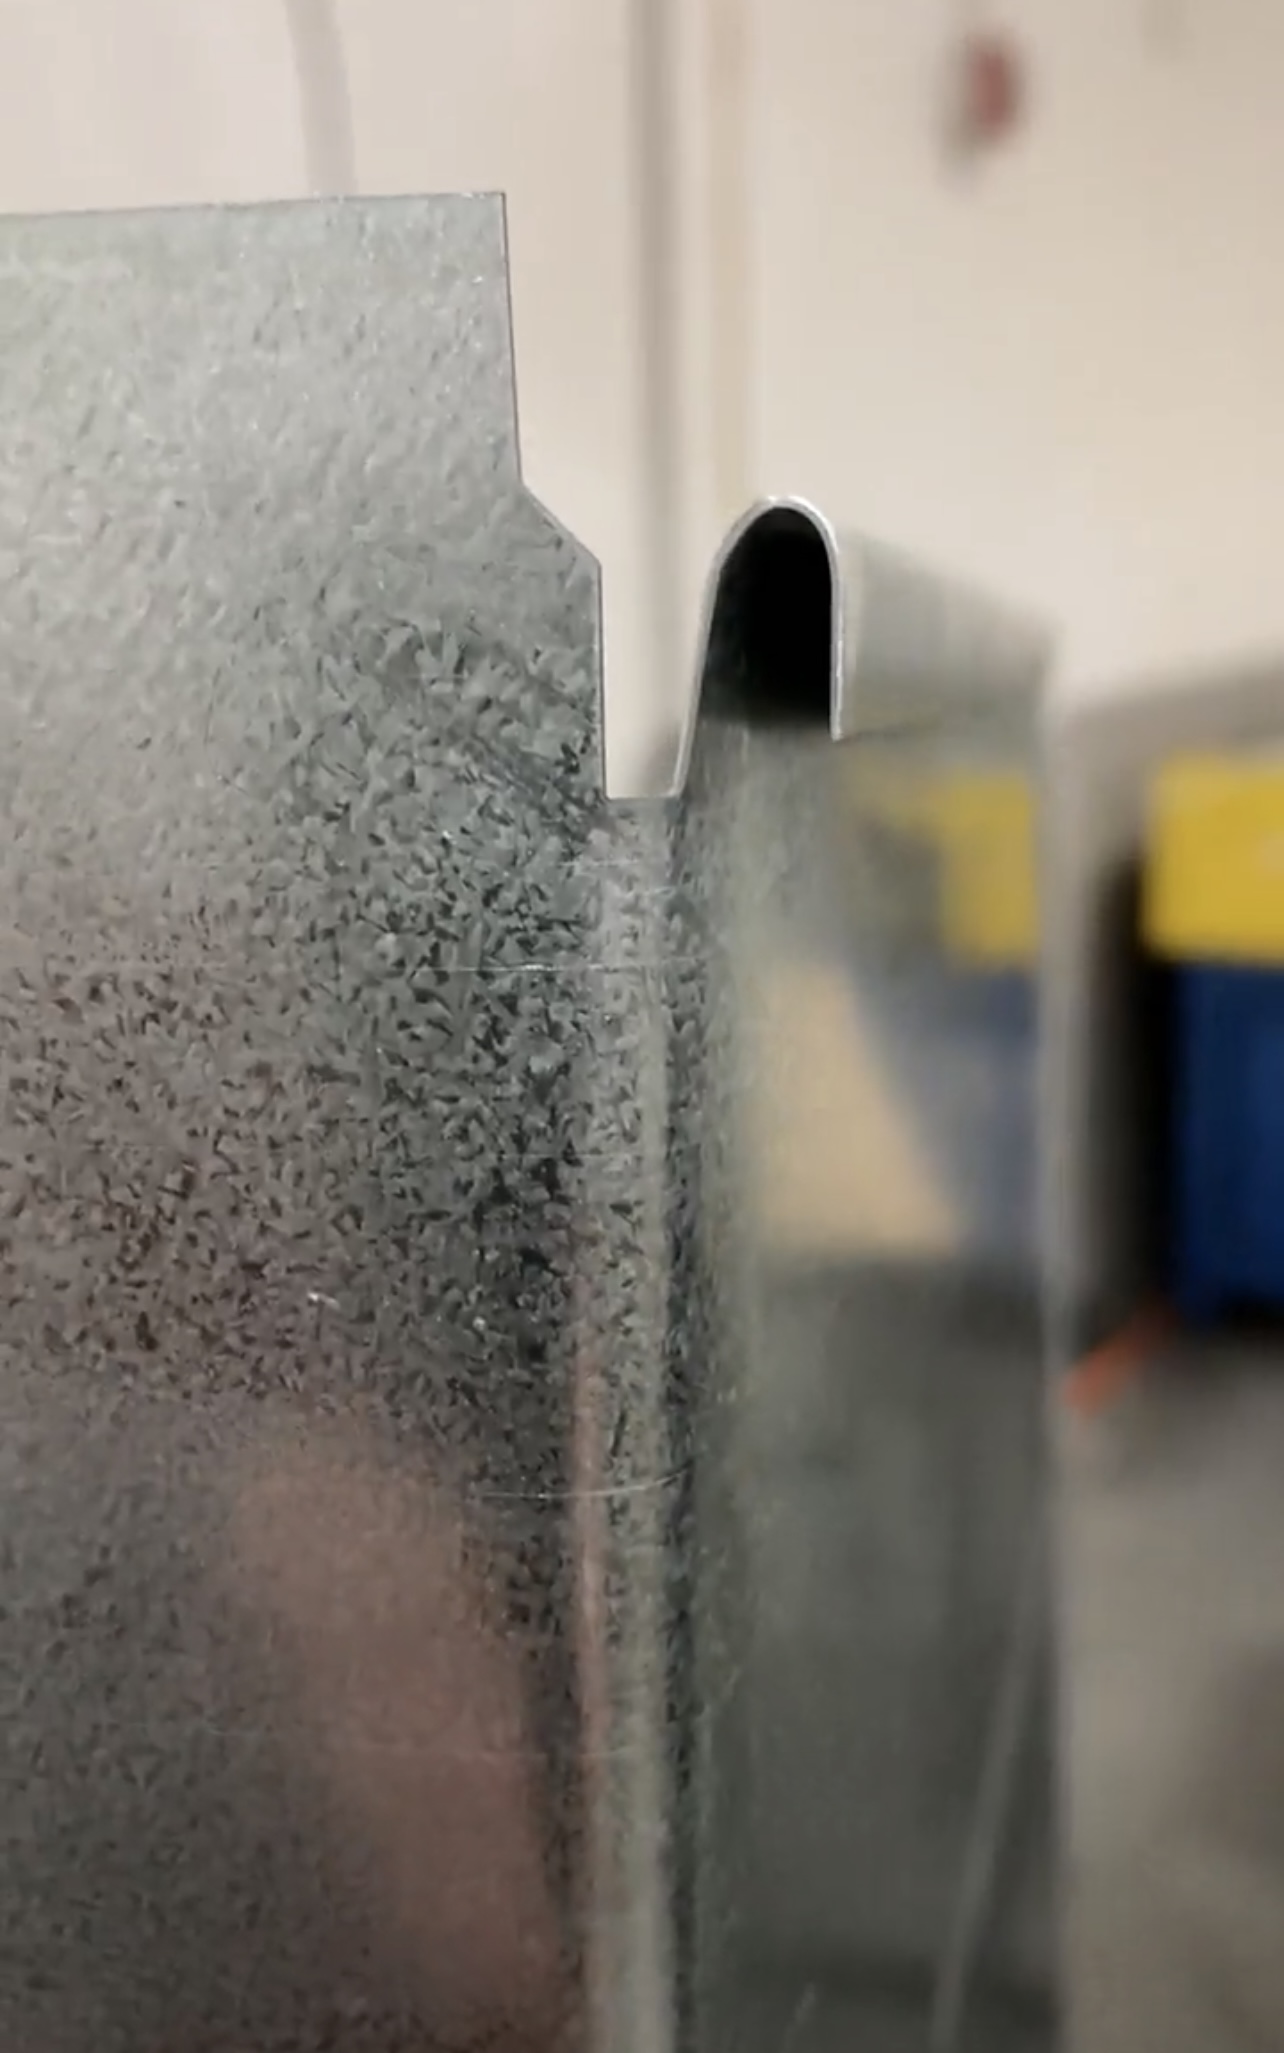
The blank leaves the Beader and goes to a Buttonlock Machine where a Female Snaplock seam is rollformed on one edge and a Male Snaplock Right Angle is rollformed on the other.
Note: a shop might use Pittsburgh instead of Snaplock on the Straight Duct if they don’t have a Buttonlock machine that rollforms the female and male Snaplock.
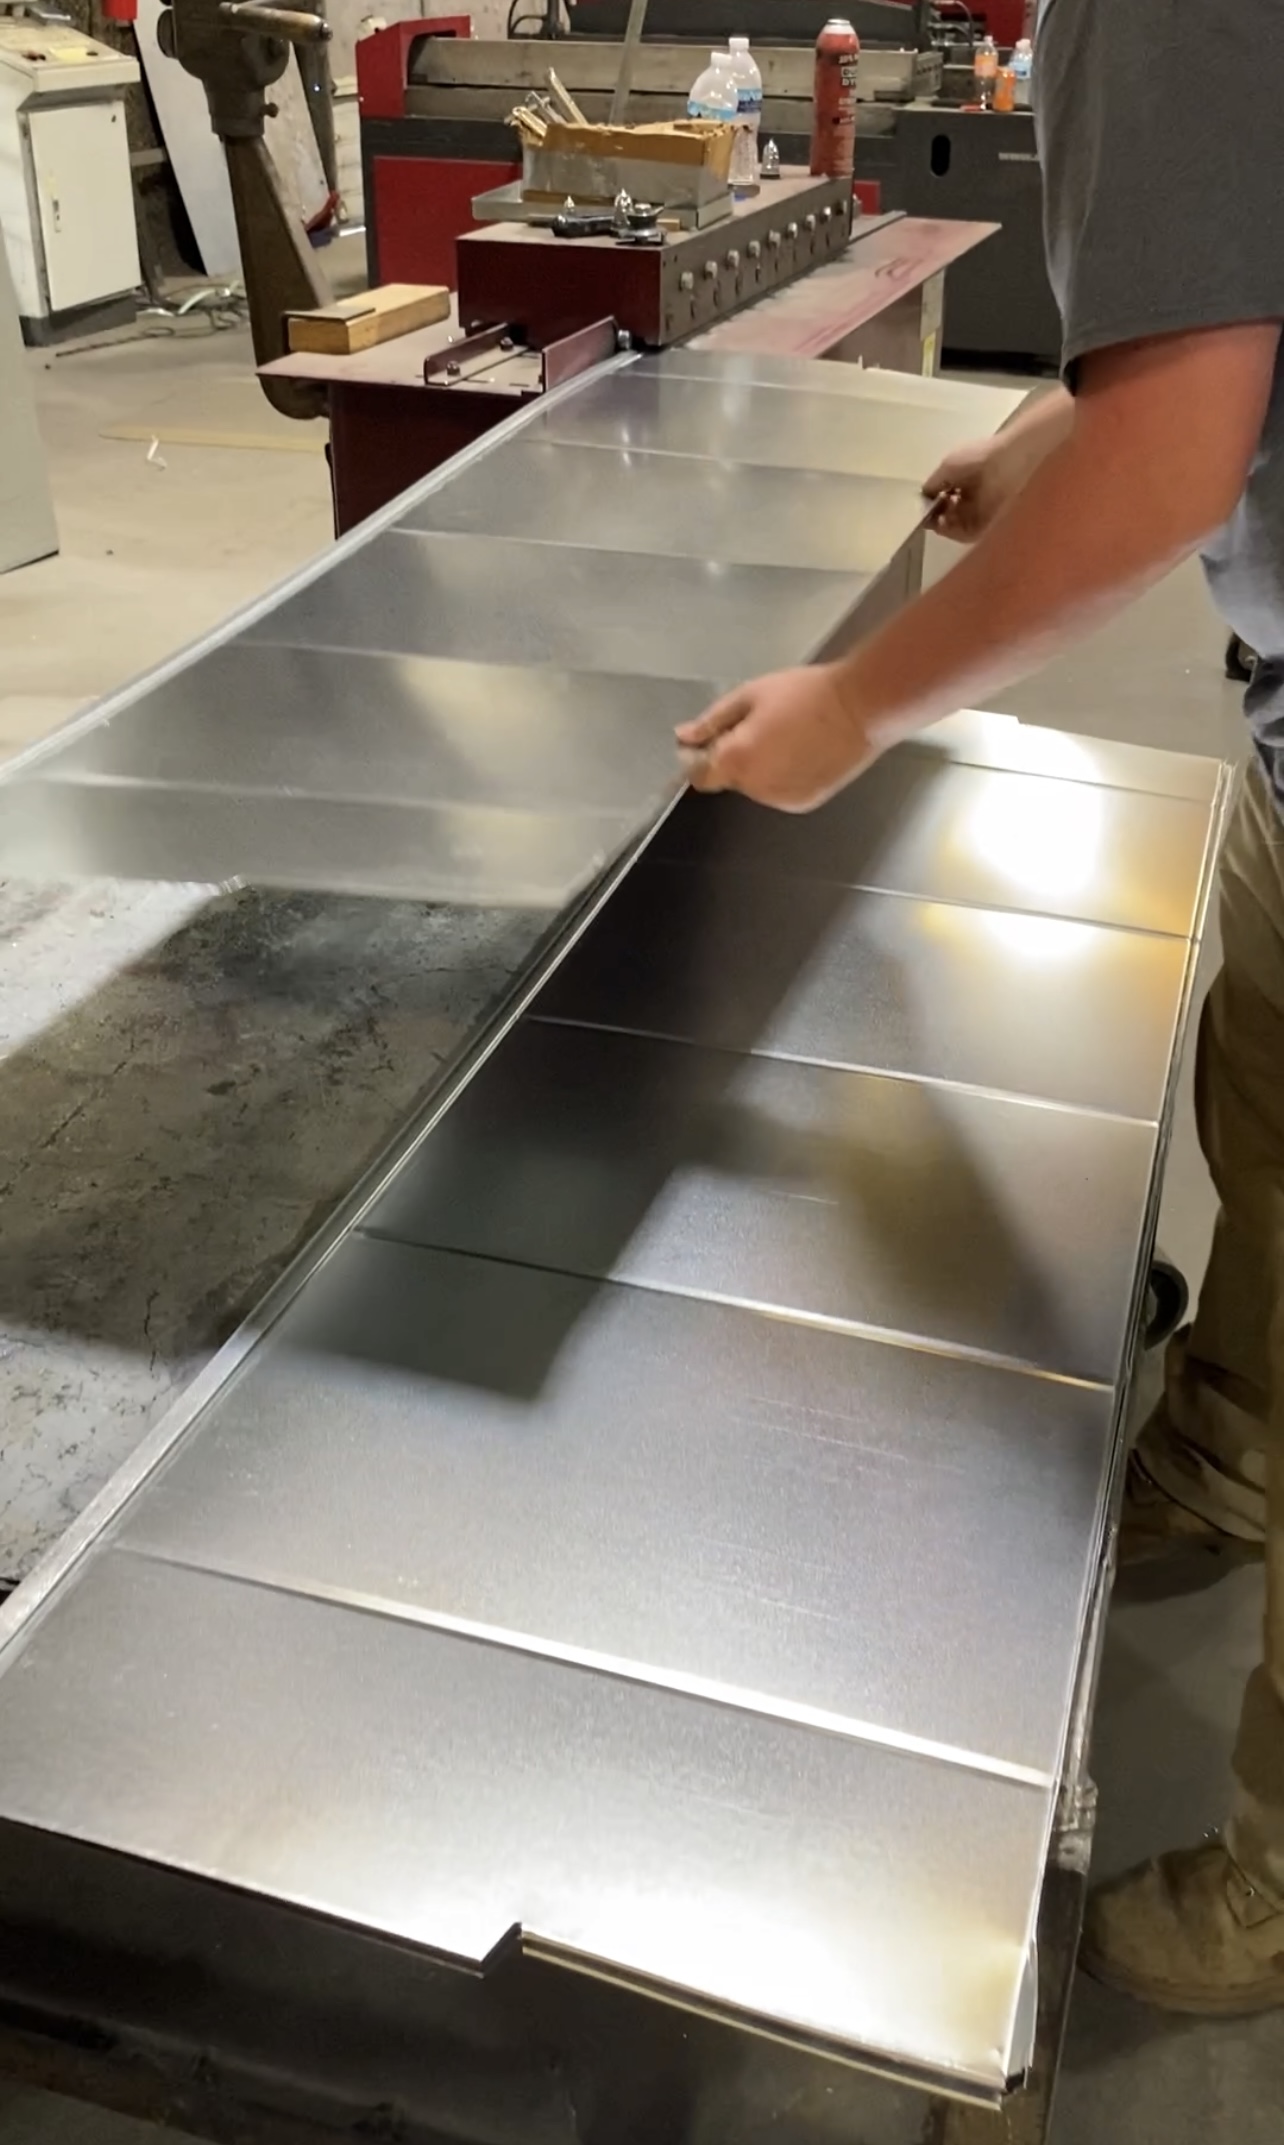
The blank leaves the Buttonlock and goes to the Hand Brake where a 90 degree bend is made on the V notch. Once the duct leaves the Hand Brake it’s one step away from being an L-Section of two piece Straight Duct.
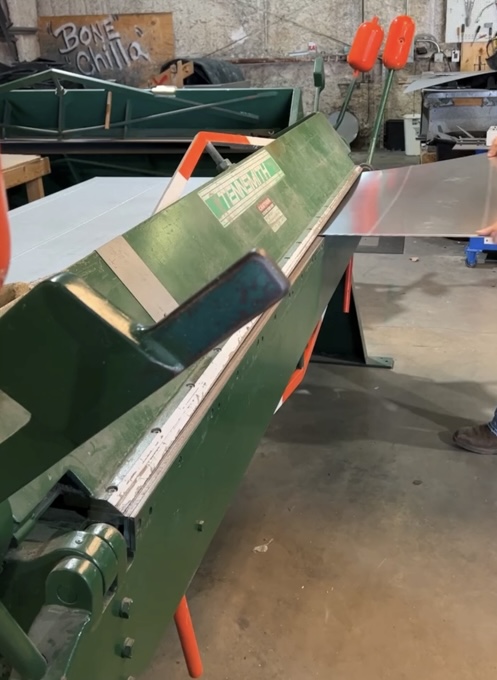
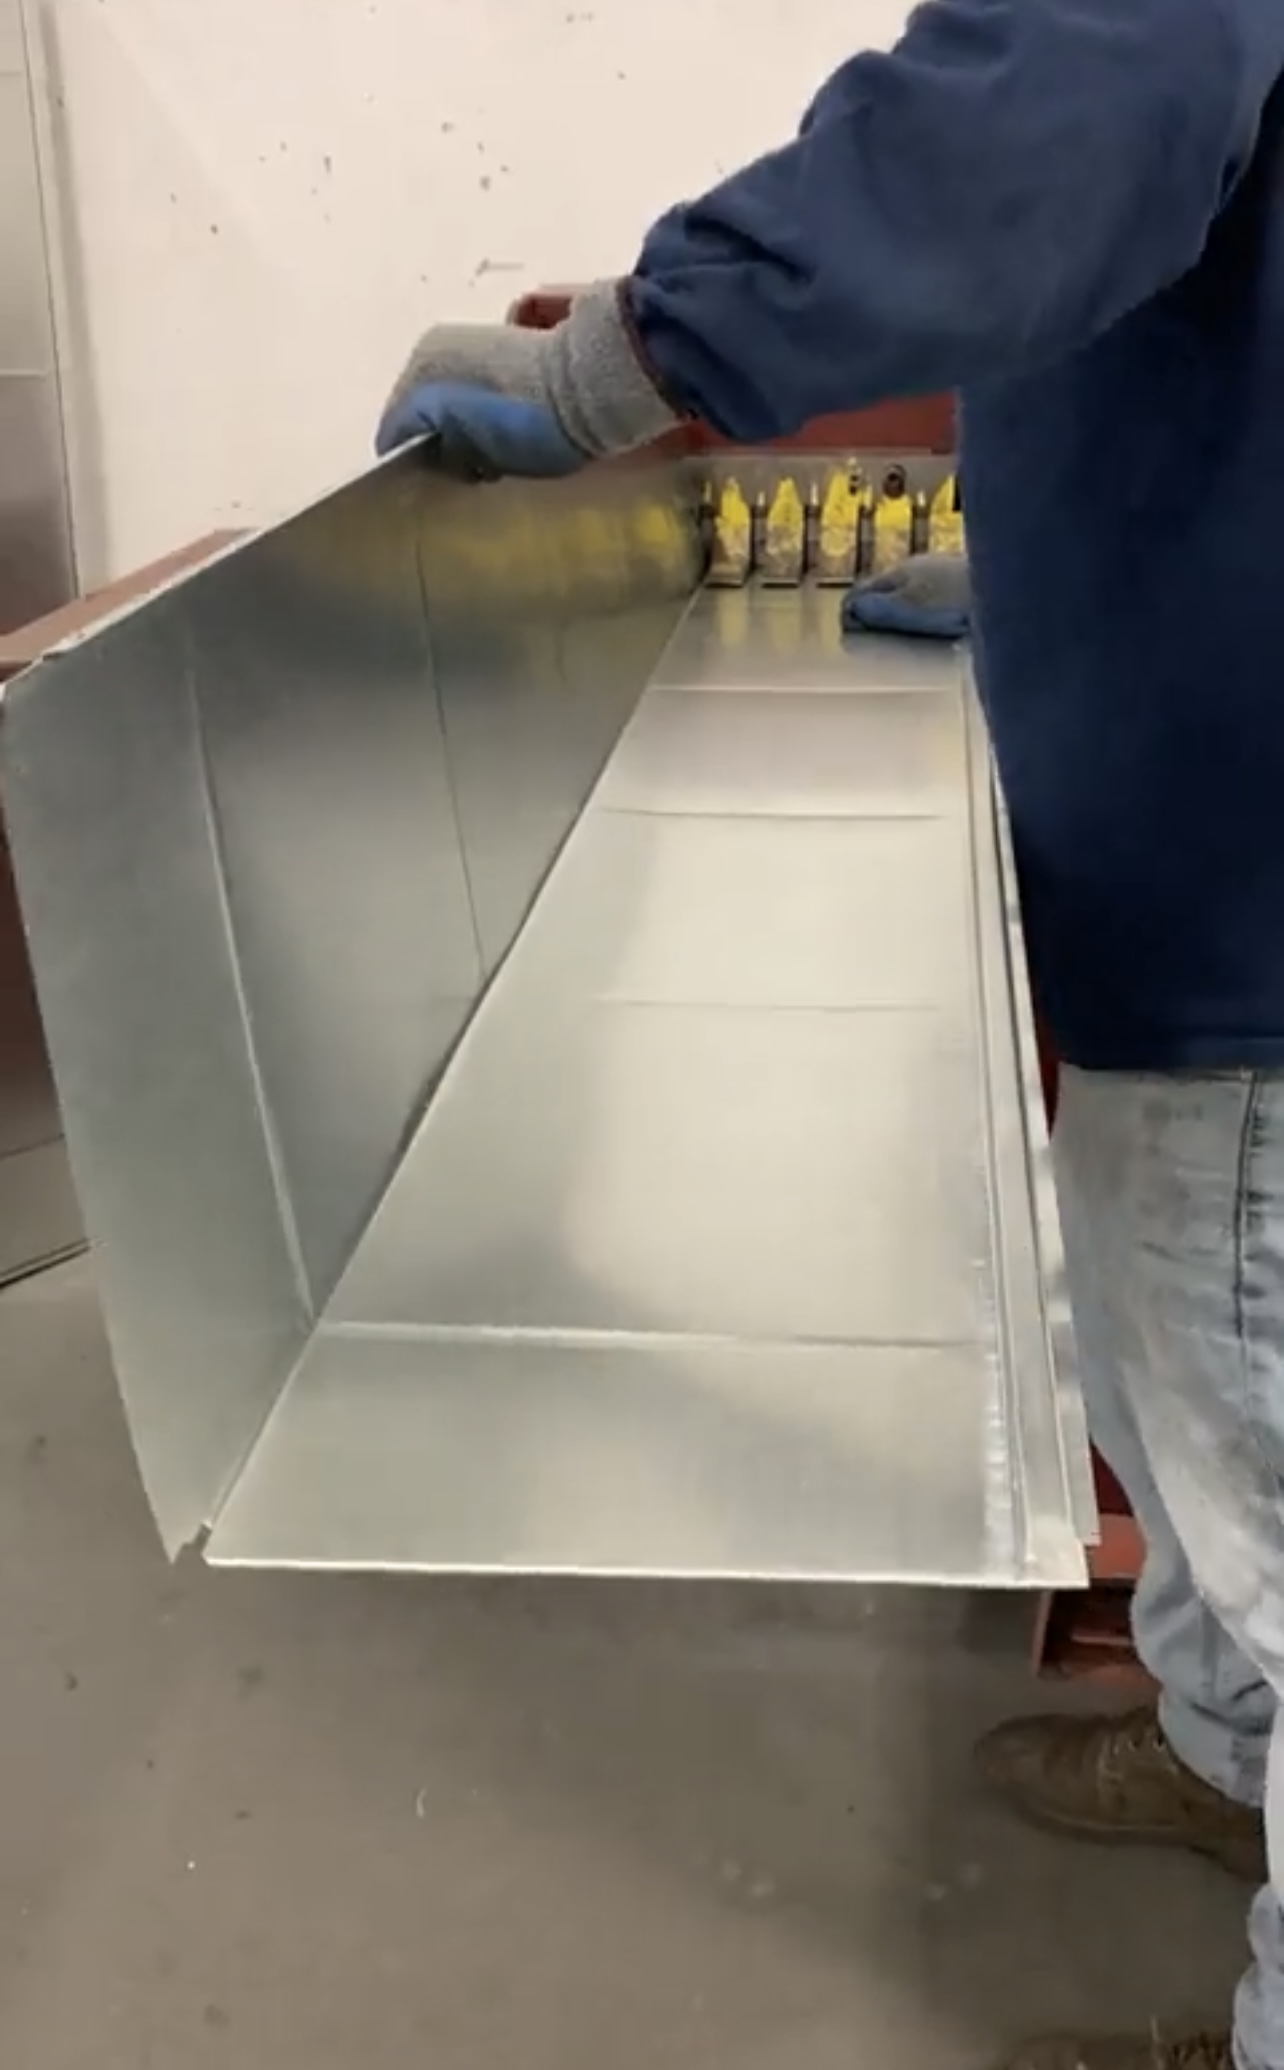
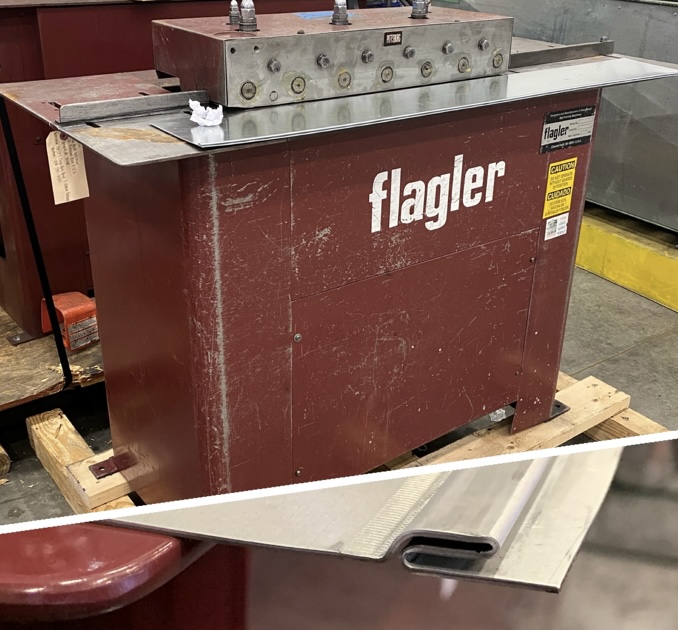
The final stop is is at the Power Cleatbender which turns a 180 degree hem (aka a Drive) on one of the two edges on each end of the L-Section.
Fittings:
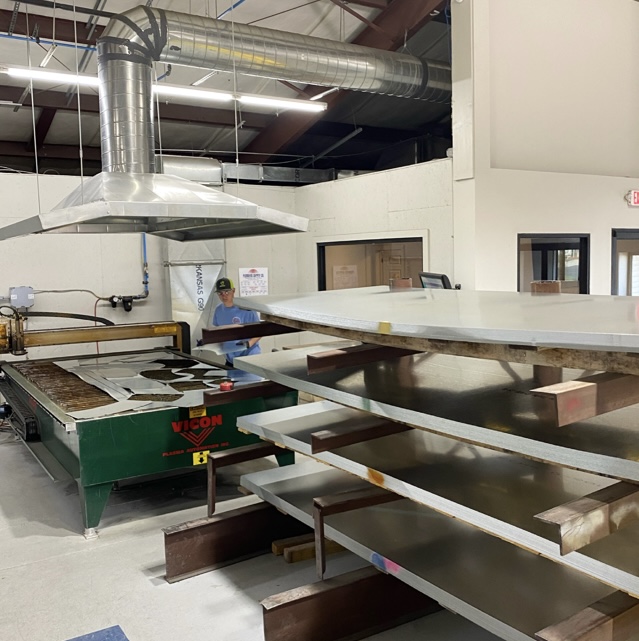
When it comes to Rectangular duct fittings, everything starts at the Plasma Table. The 4×10 or 5×10 sheet is hand pulled from the Rack onto the Plasma Table. The operator inputs the fittings desired along with the dimension of the assembled fitting and the plasma cuts out the required 4 pieces in the flat while printing out self stick labels to serve as identification markers on every single flat cut out.
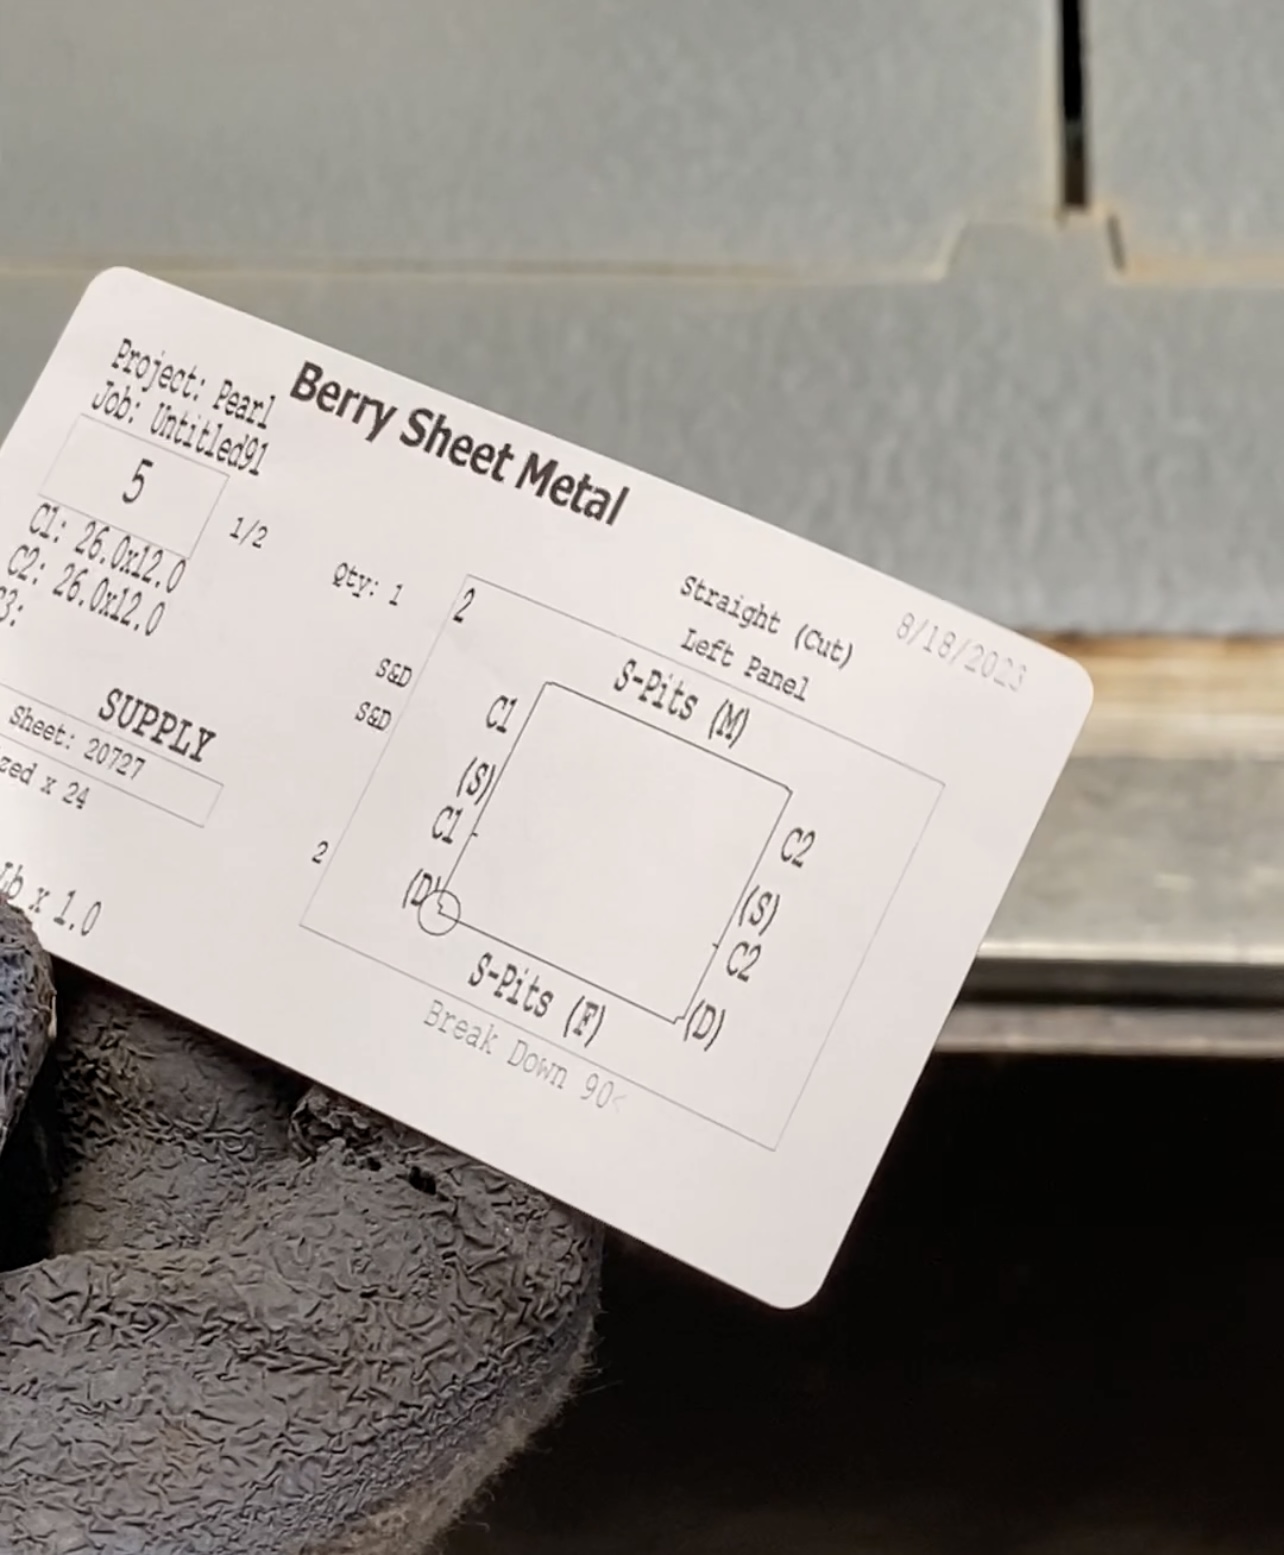
The flat shapes are then pulled off the Plasma Table, flipped over so that the ID sticker is facing down, and then run thru the sheet Beader. Any part of a fitting that’s under 19″ wide will, by SMACNA standards, not require a bead or cross break. However, shops make it a practice to send most all flats over 12″ wide thru the Beader so as to not require keeping track of what gets beaded and what gets left flat.
Once it leaves the Beader, the flats go one of two ways depending on if it’s a Square Fitting or a Radius Fitting.
Radius Fittings:
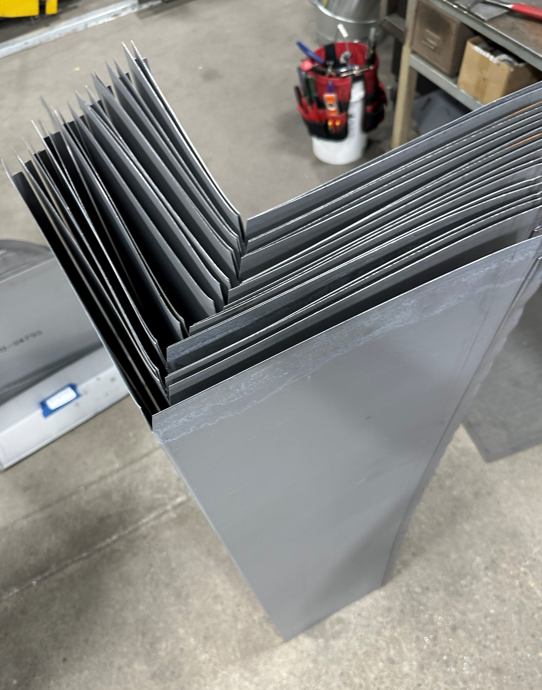
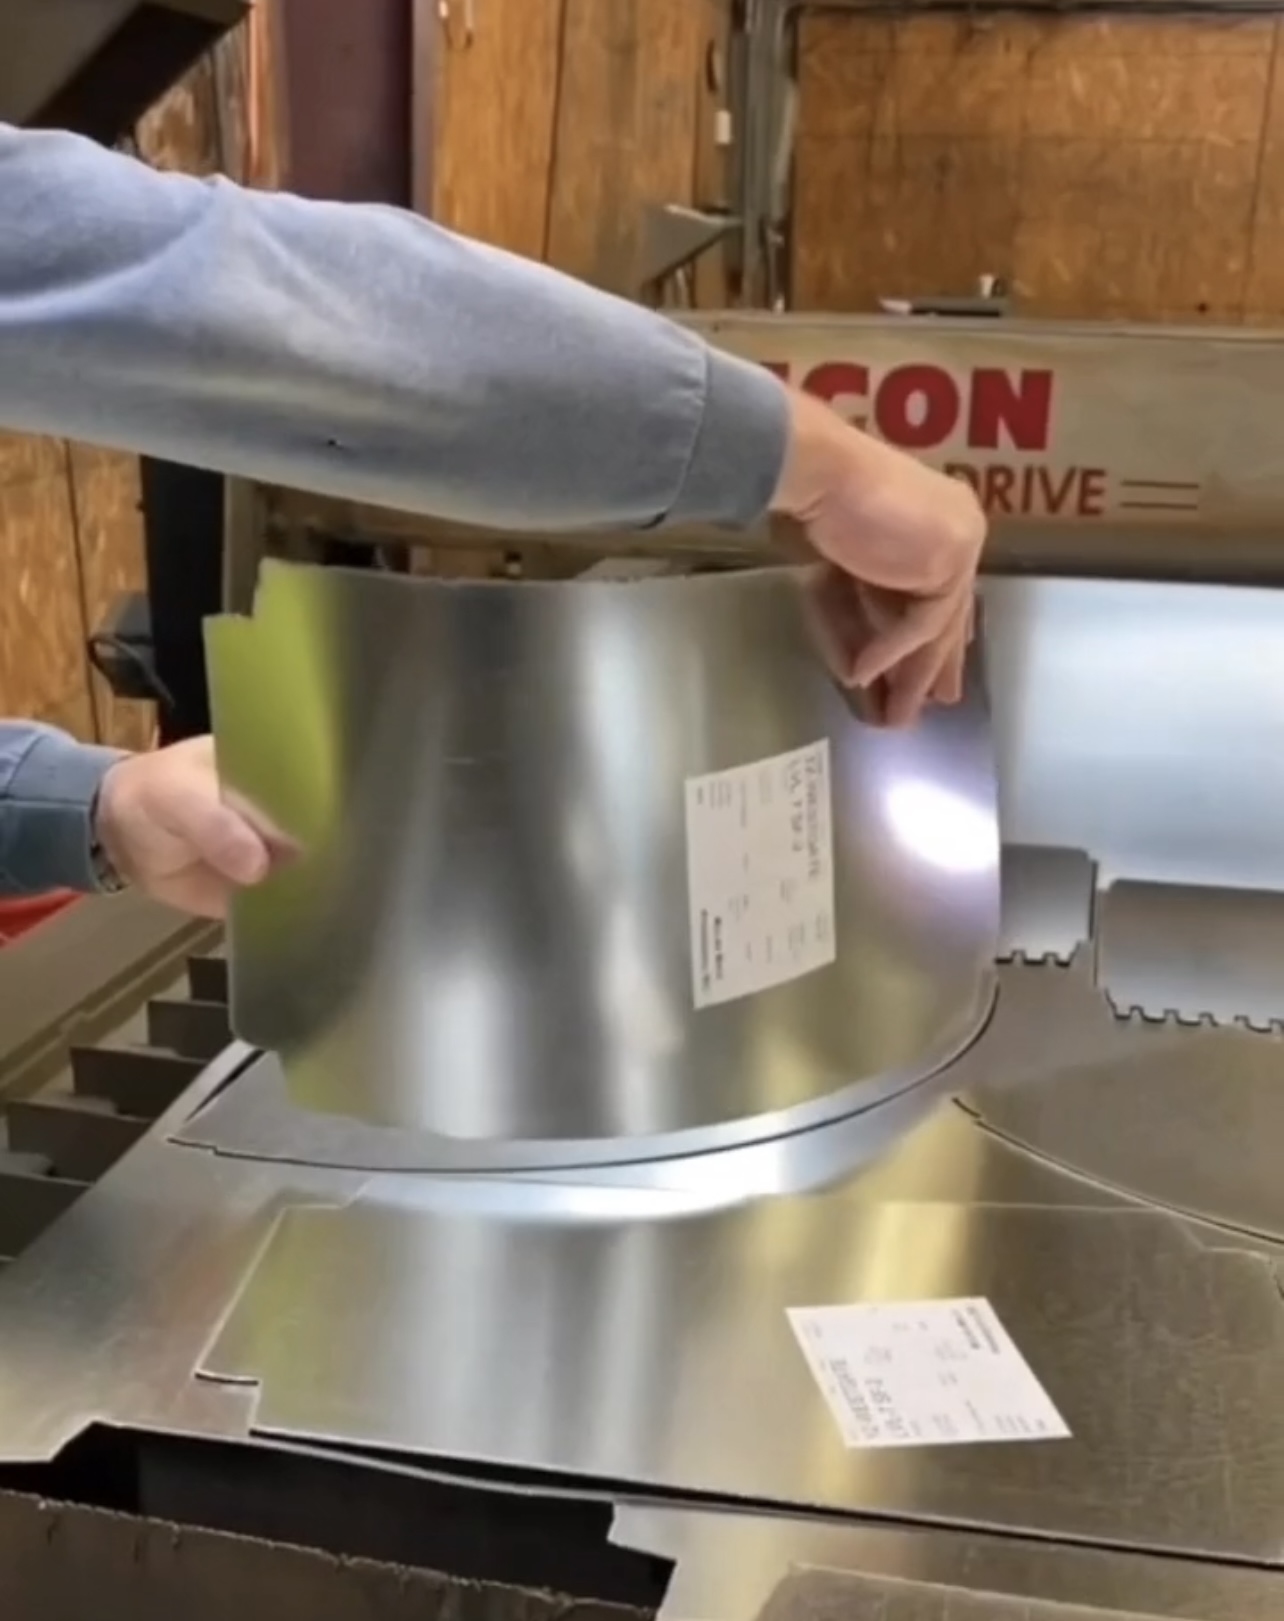
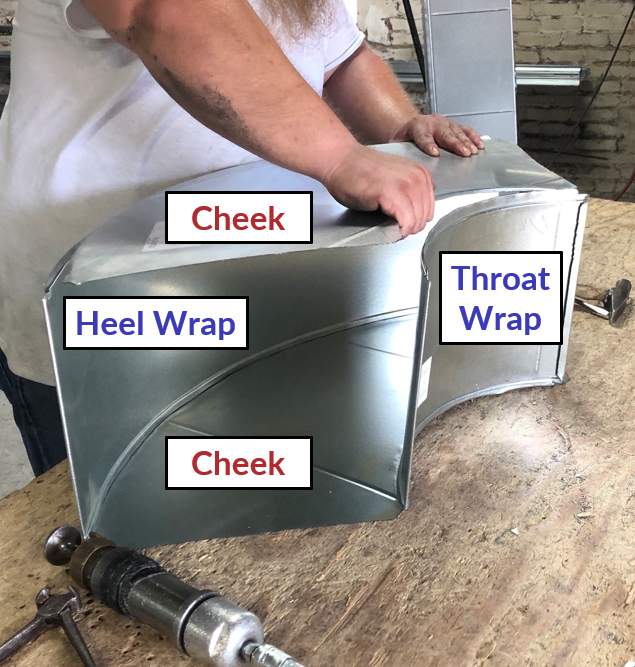
If it’s a Radius Fitting, the two flats that will serve as sides of the elbow (aka cheeks) are taken to the Easy Edger or similar Flanger that will rollform a 90 degree 1/4″ flange on the two curved parts of each cheek.
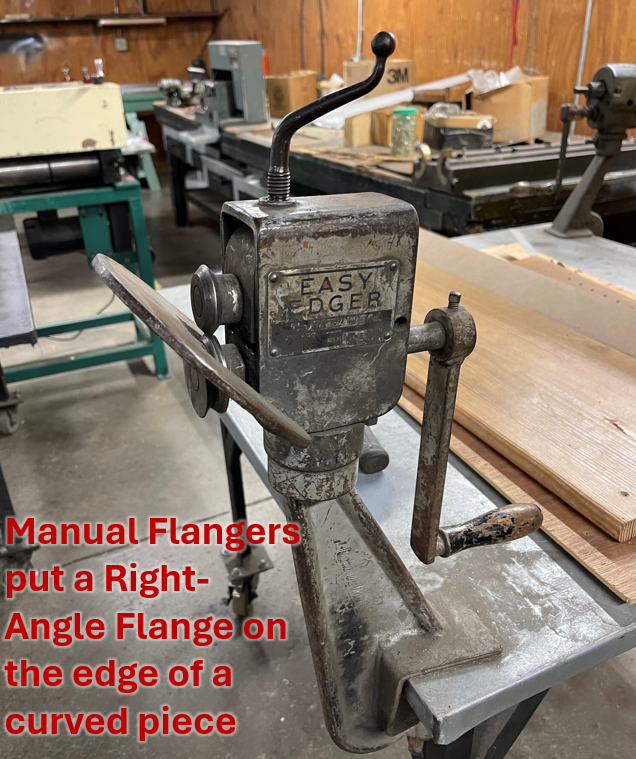
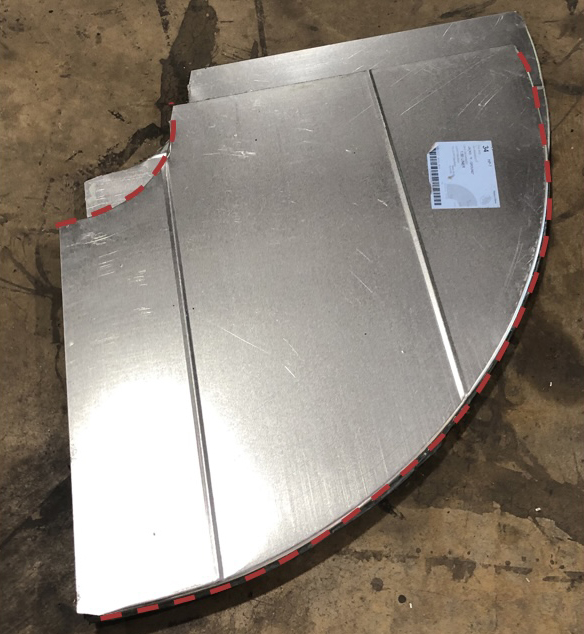
Flangers turn a Right Angle Flange on a curved piece
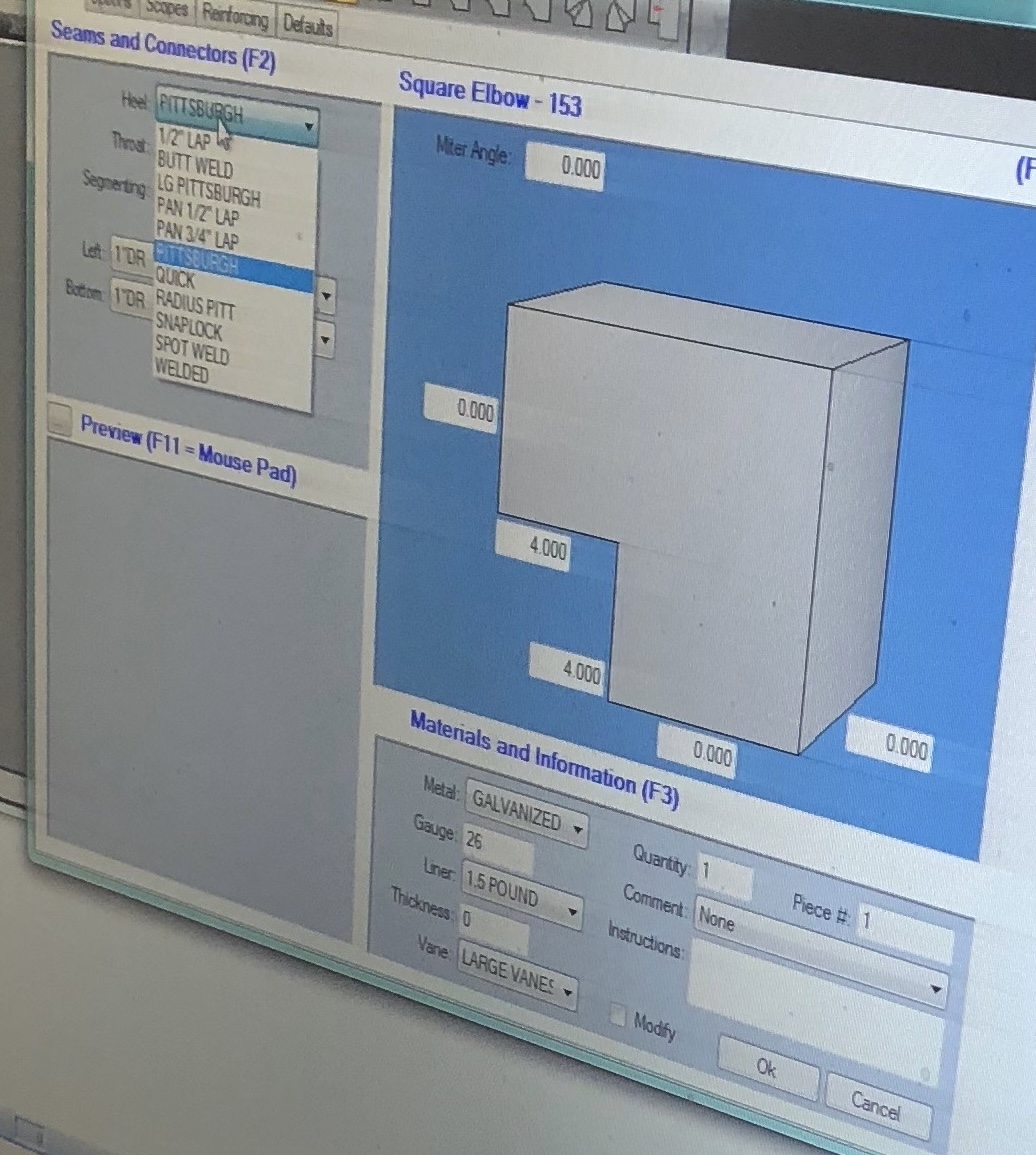
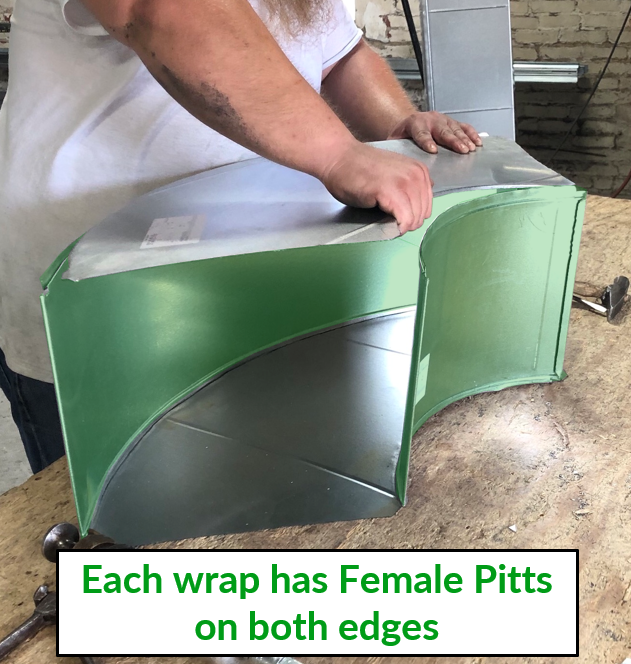
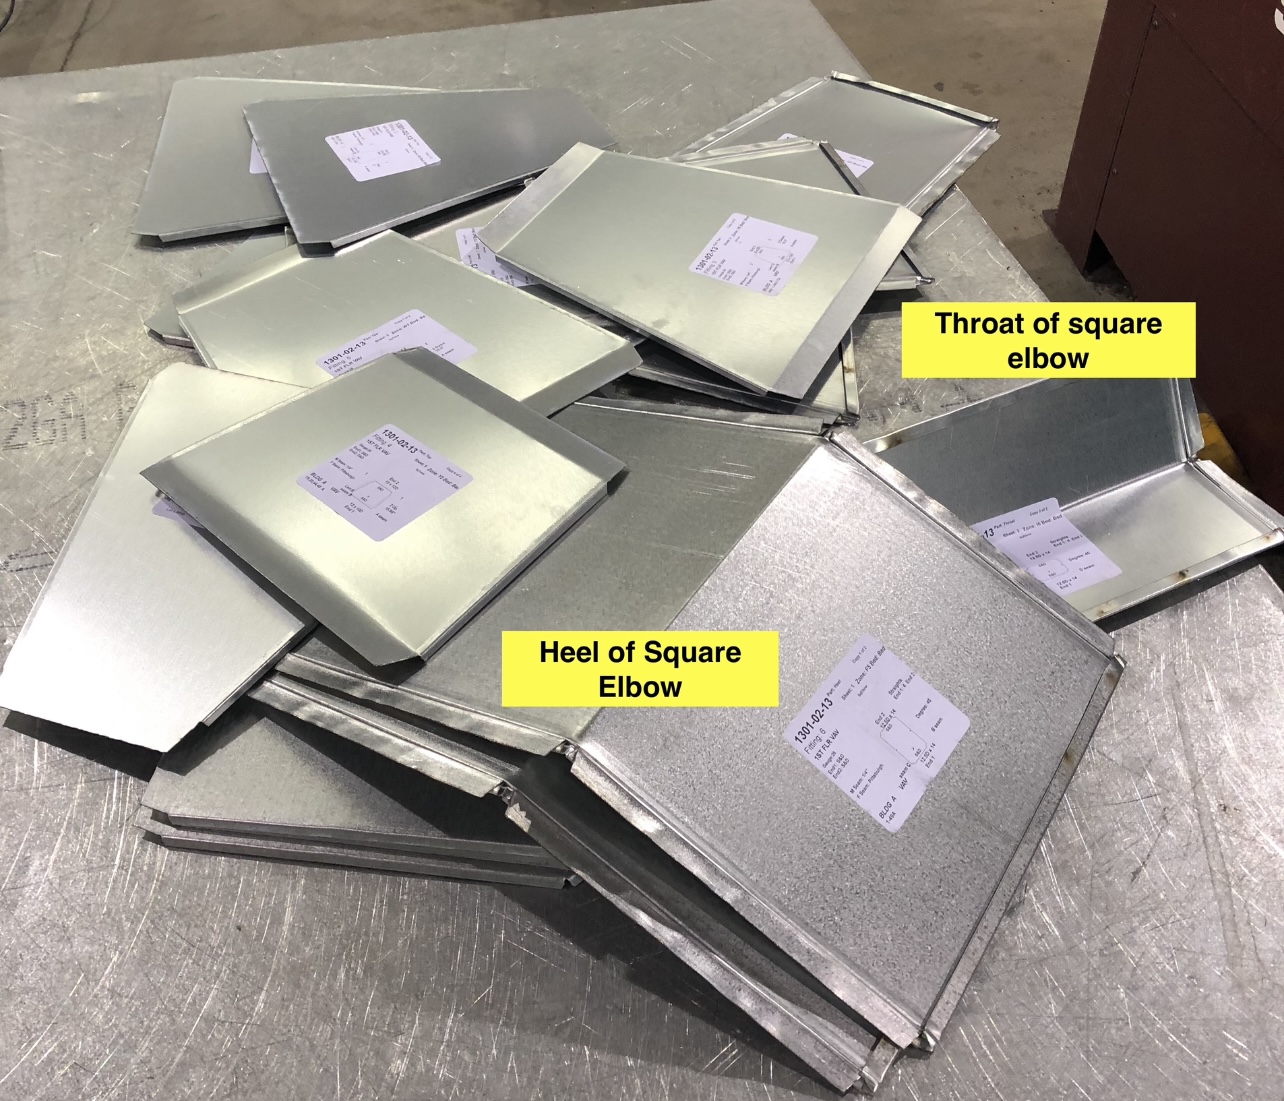
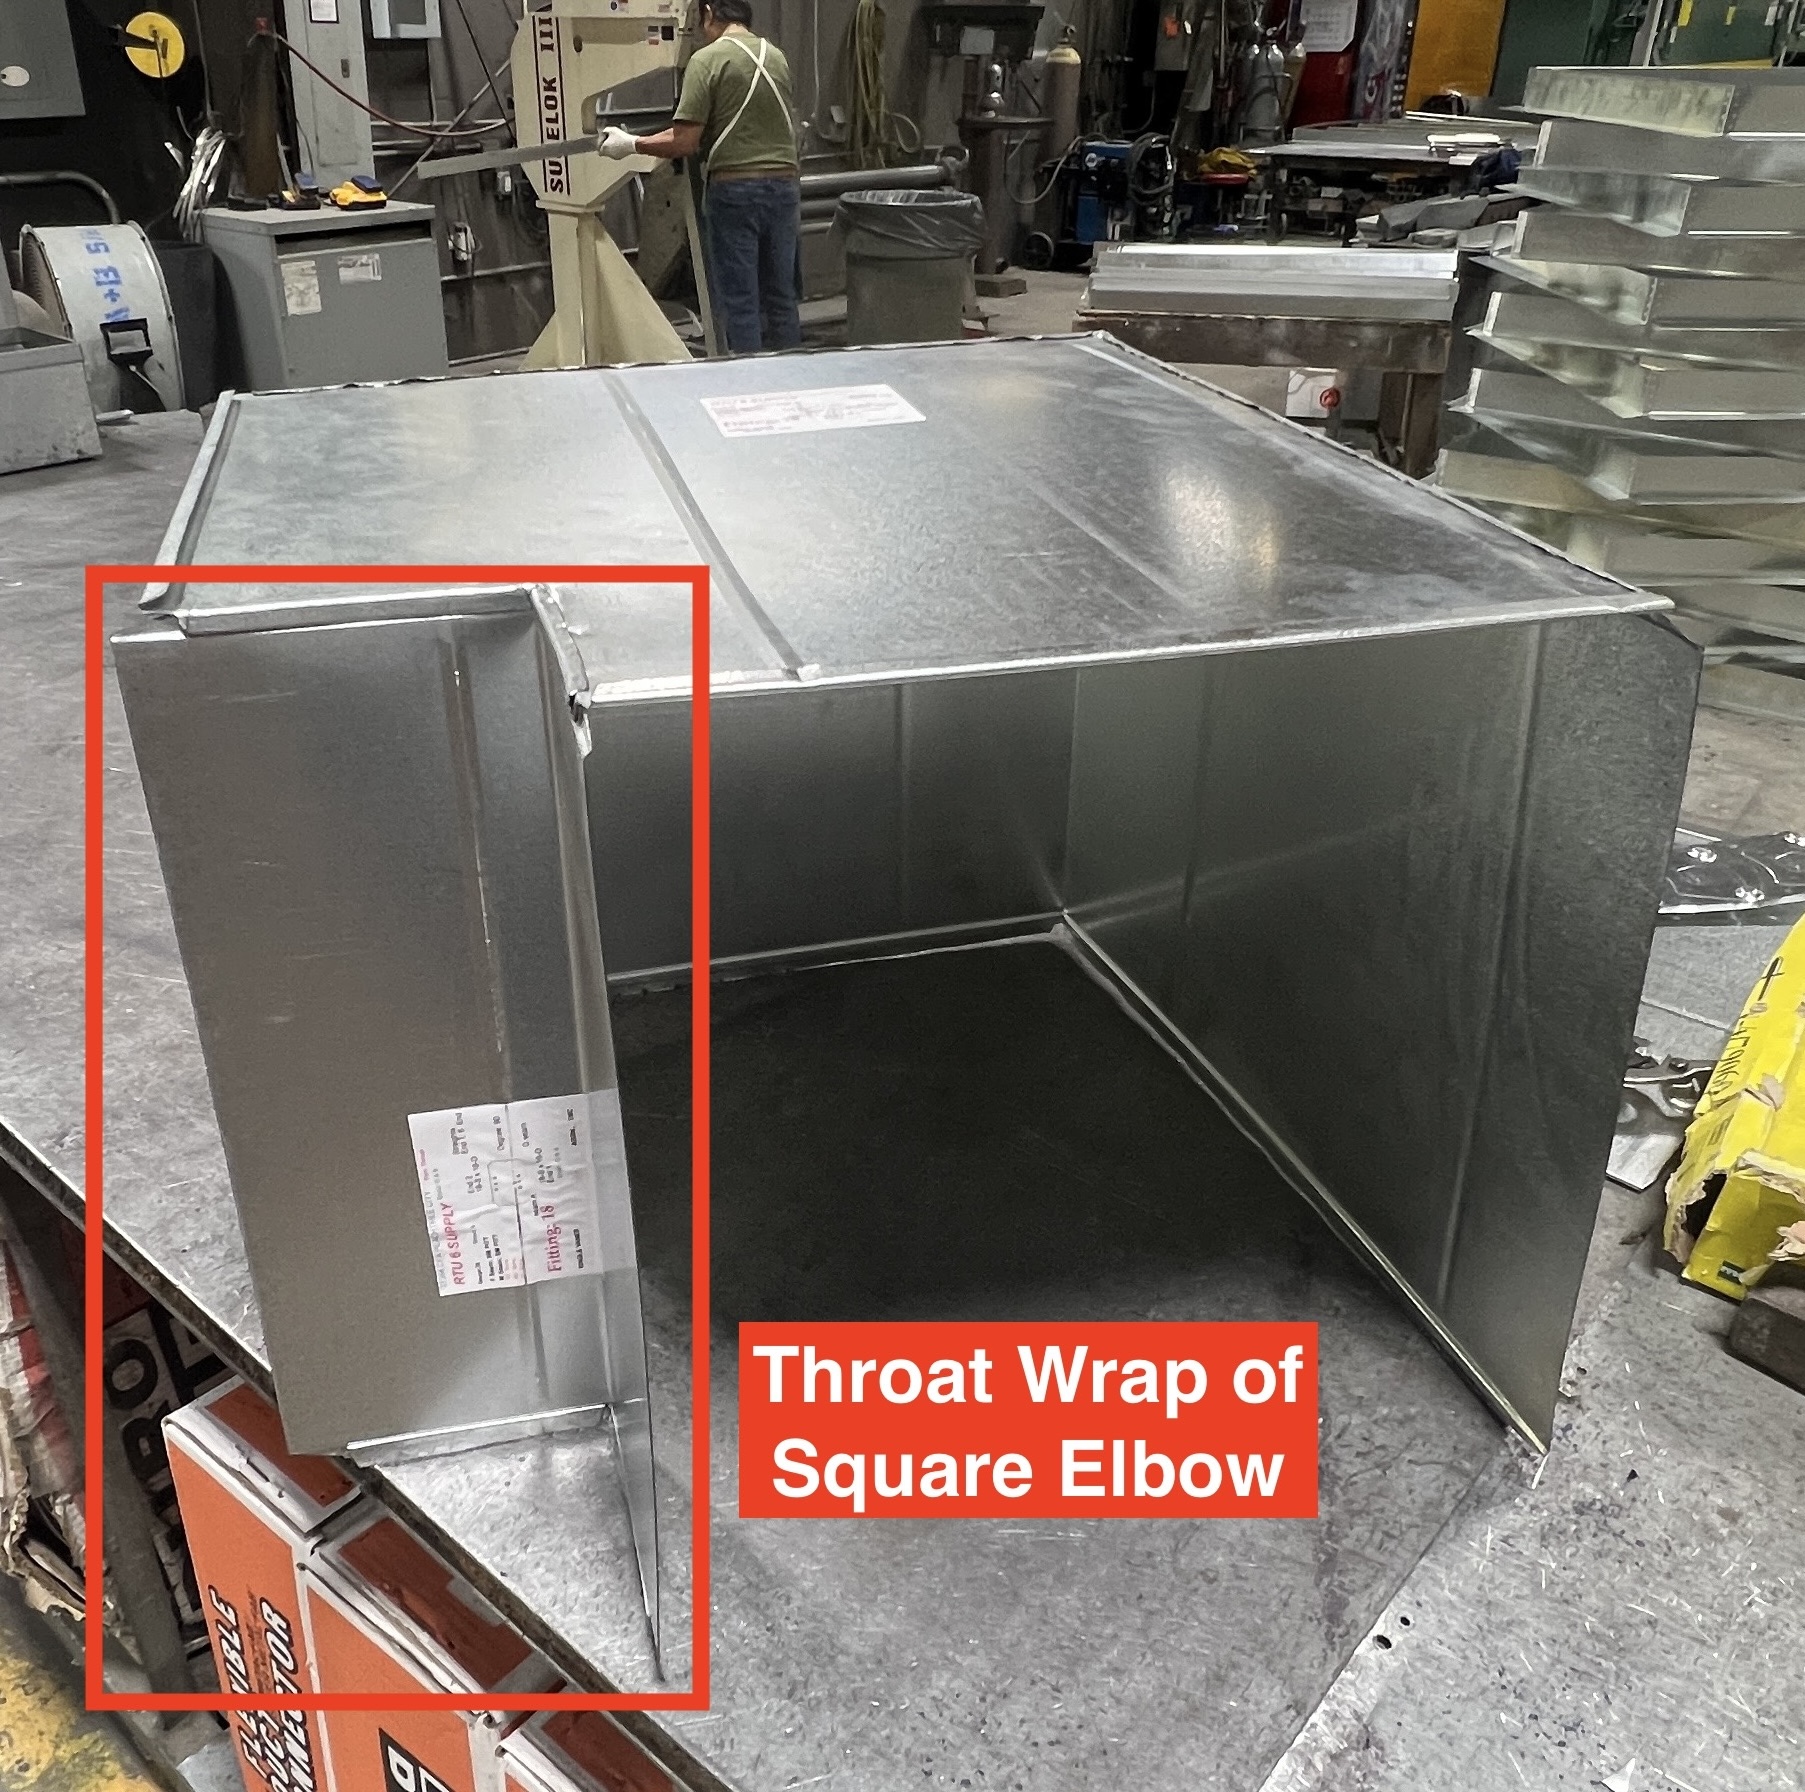
The inner throat wrap and the outer Heel Wrap are taken to the Pittsburgh Machine and a Female Pittsburgh seam is rollformed on BOTH edges of BOTH pieces and then these two pieces are taken to the Pexto manual roller and made into a curve so as to accommodate the two cheeks. Almost always, the Heel Wrap and Throat wrap of Radius Fittings have a drive turned on both of the two wraps. This differs from square fittings that often have the drive on the cheeks instead of the wraps. The Cleatbender is used to turn this drive.

At that point, the two cheeks are assembled into the two wraps.

Square Fittings:
Rectangular Duct fittings made with straight angles are easier when assembling the male right angle into the Pittsburgh pocket but usually square fittings require turning vanes to turn the air more effectively.
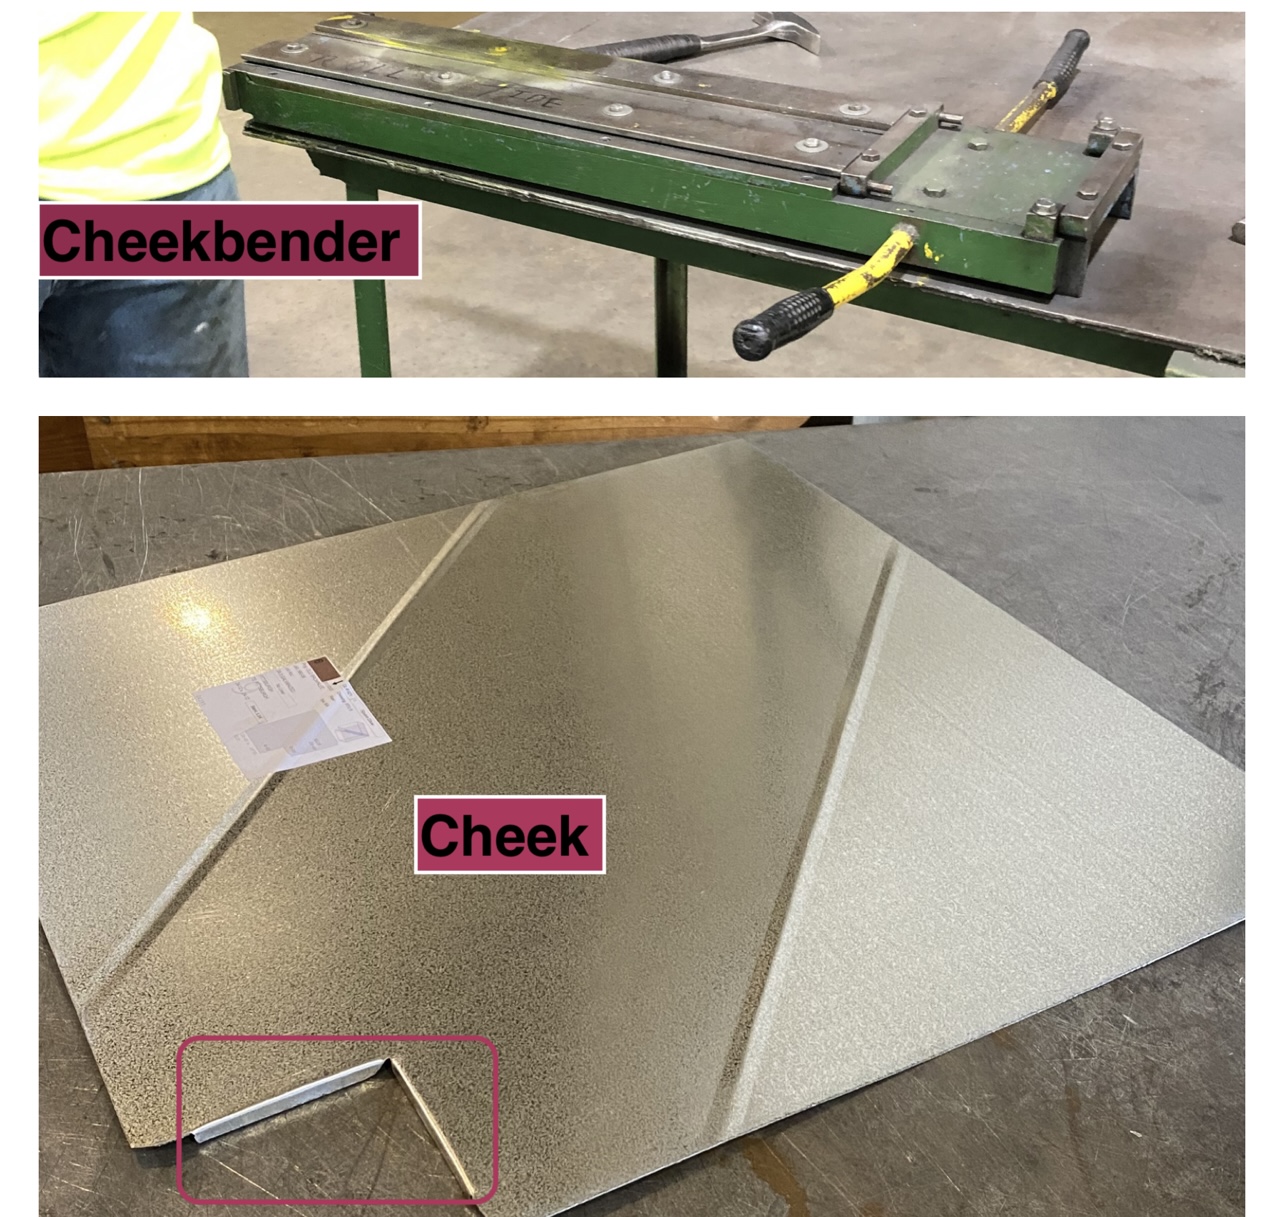
Like a radius fitting, square fittings always have two cheeks, a throat wrap and a Heel Wrap. The two cheeks always have the Right Angle Flange on each edge. Once the Cheeks leave the Plasma Table or Beader, they are taken to the Cheekbender and a 90 degree 1/4″ Right Angle Flange (aka Male Pittsburgh) is turned on each of the two edges of both cheeks. If the Cheek has a Heel dimension over 24″, a Hand Brake is used to turn this flange.


The Heel Wrap and the Throat Wrap leave the Plasma Table or Beader and go to the Pittsburgh Machine. Here a Female Pittsburgh seam is rollformed on BOTH edges of BOTH pieces.
The two pieces that have Female Pittsburgh on each edge are then taken to the Bench mount brake and a 90 degree bend is turned. On Square Fittings, sometimes a drive is turned on the two ends of the Heel and Wrap, other times it’s turned on the Cheeks instead.
At this point, there are two cheeks and two wraps, ready for assembly.

For a basic Duct Shop using Slip and Drive for the Transverse Joints, Snaplock on the Longitudinal seams of Straight Duct and Pittsburgh on the Longitudinal seams for Fittings, here’s an example of a possible fabrication sequence: